Overview of the WOptimize WordPress Plugin
WOptimize is a WooCommerce cleanup and maintenance plugin that helps you identify, review, and remove unnecessary data from your store.
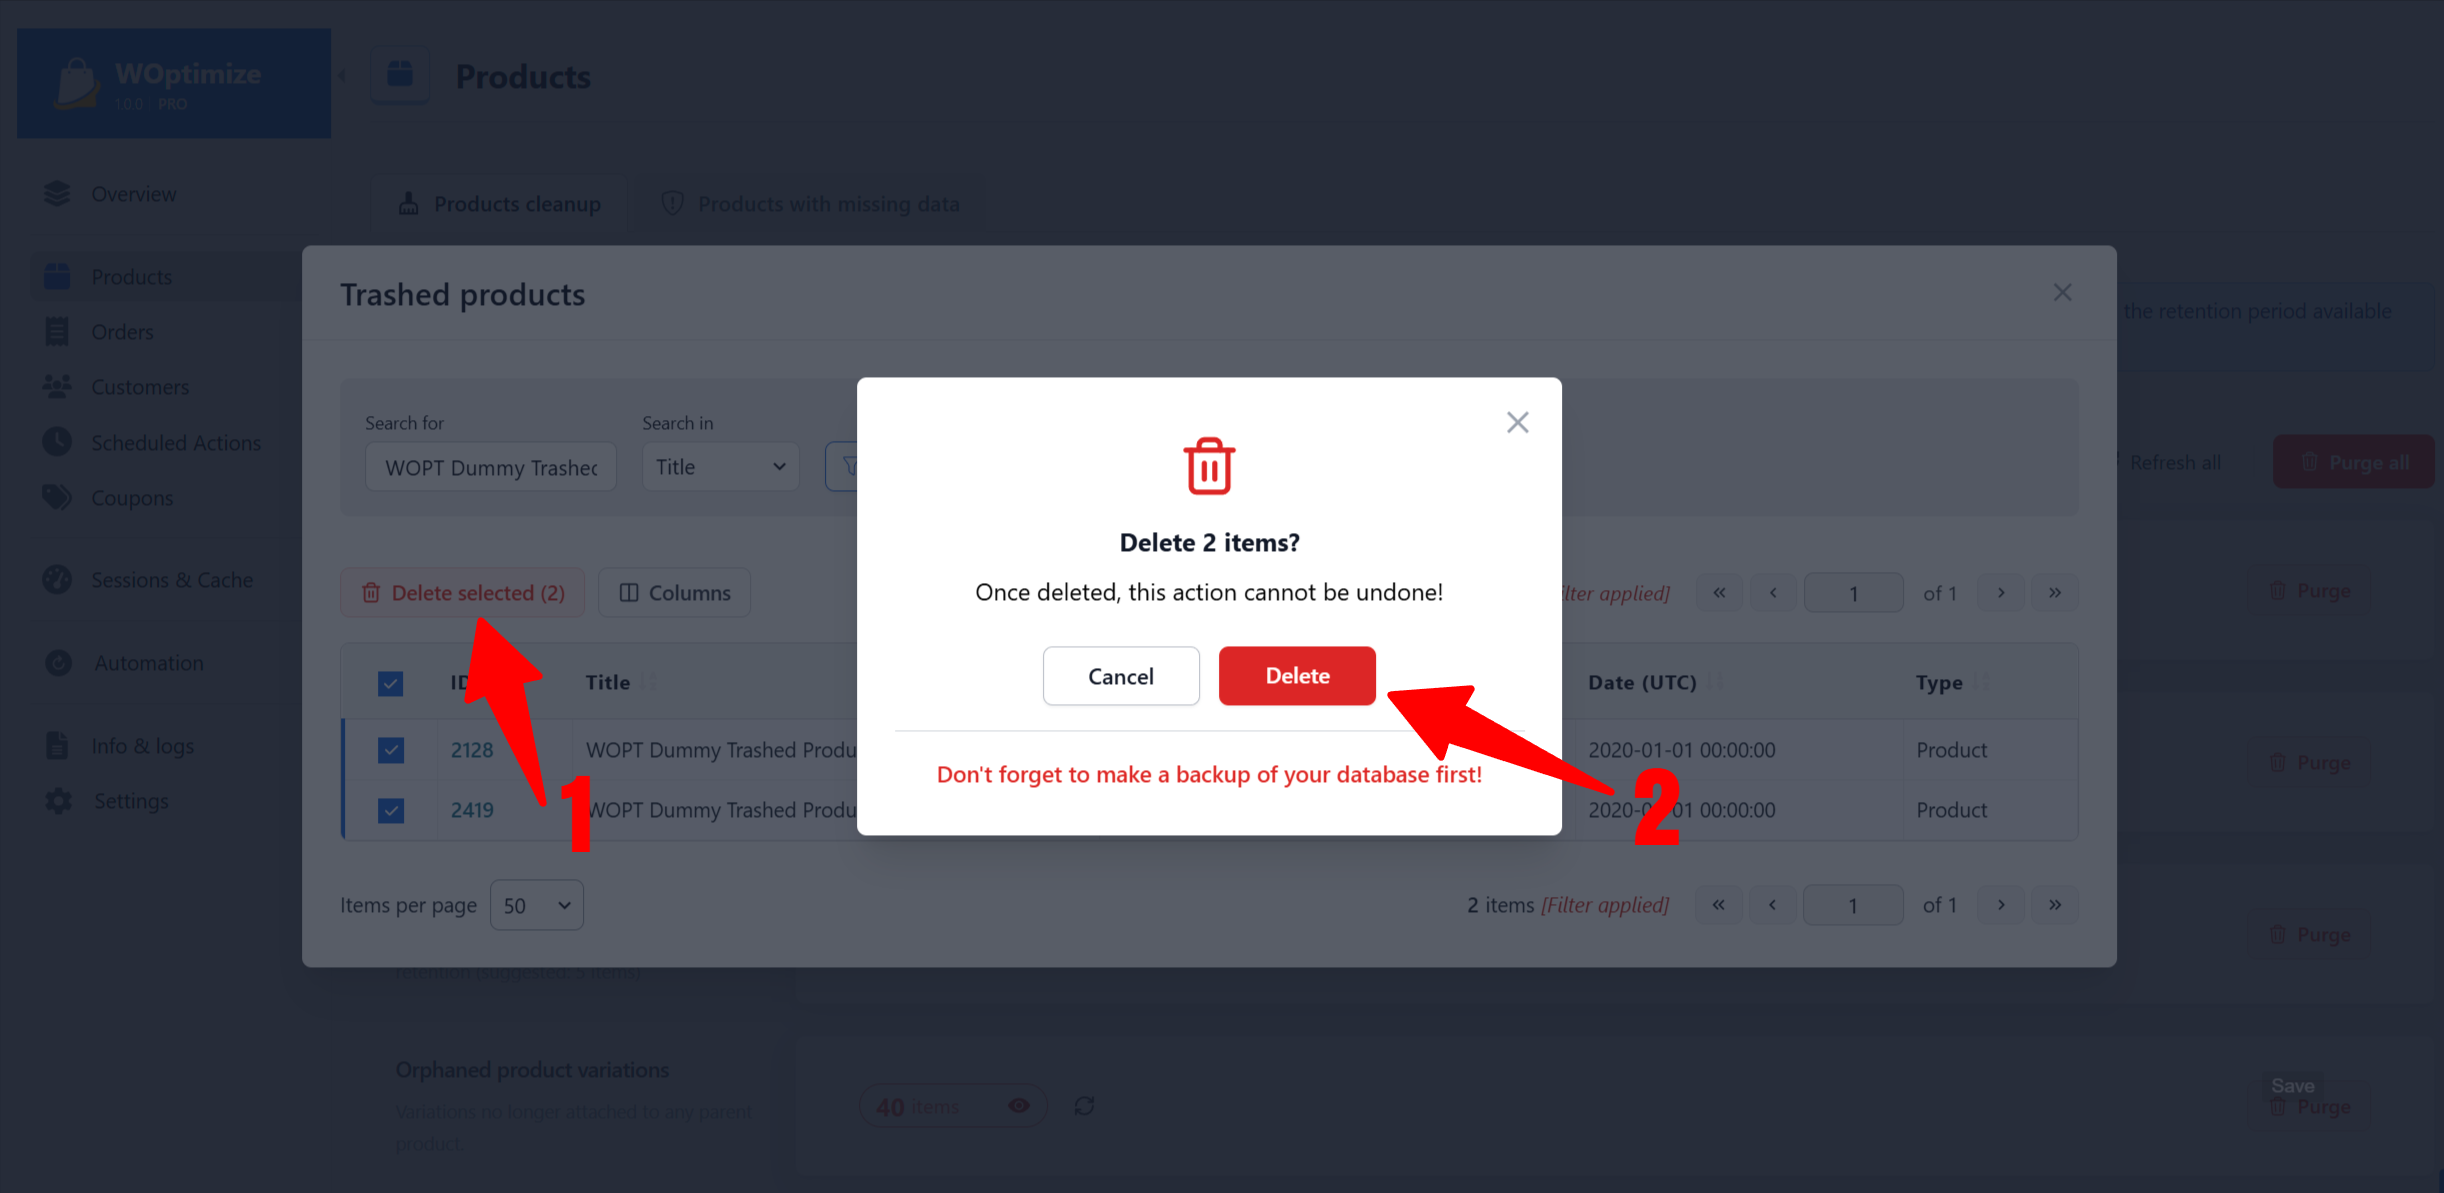
Important: Before deleting data, create a full database backup or test the cleanup on a staging site.
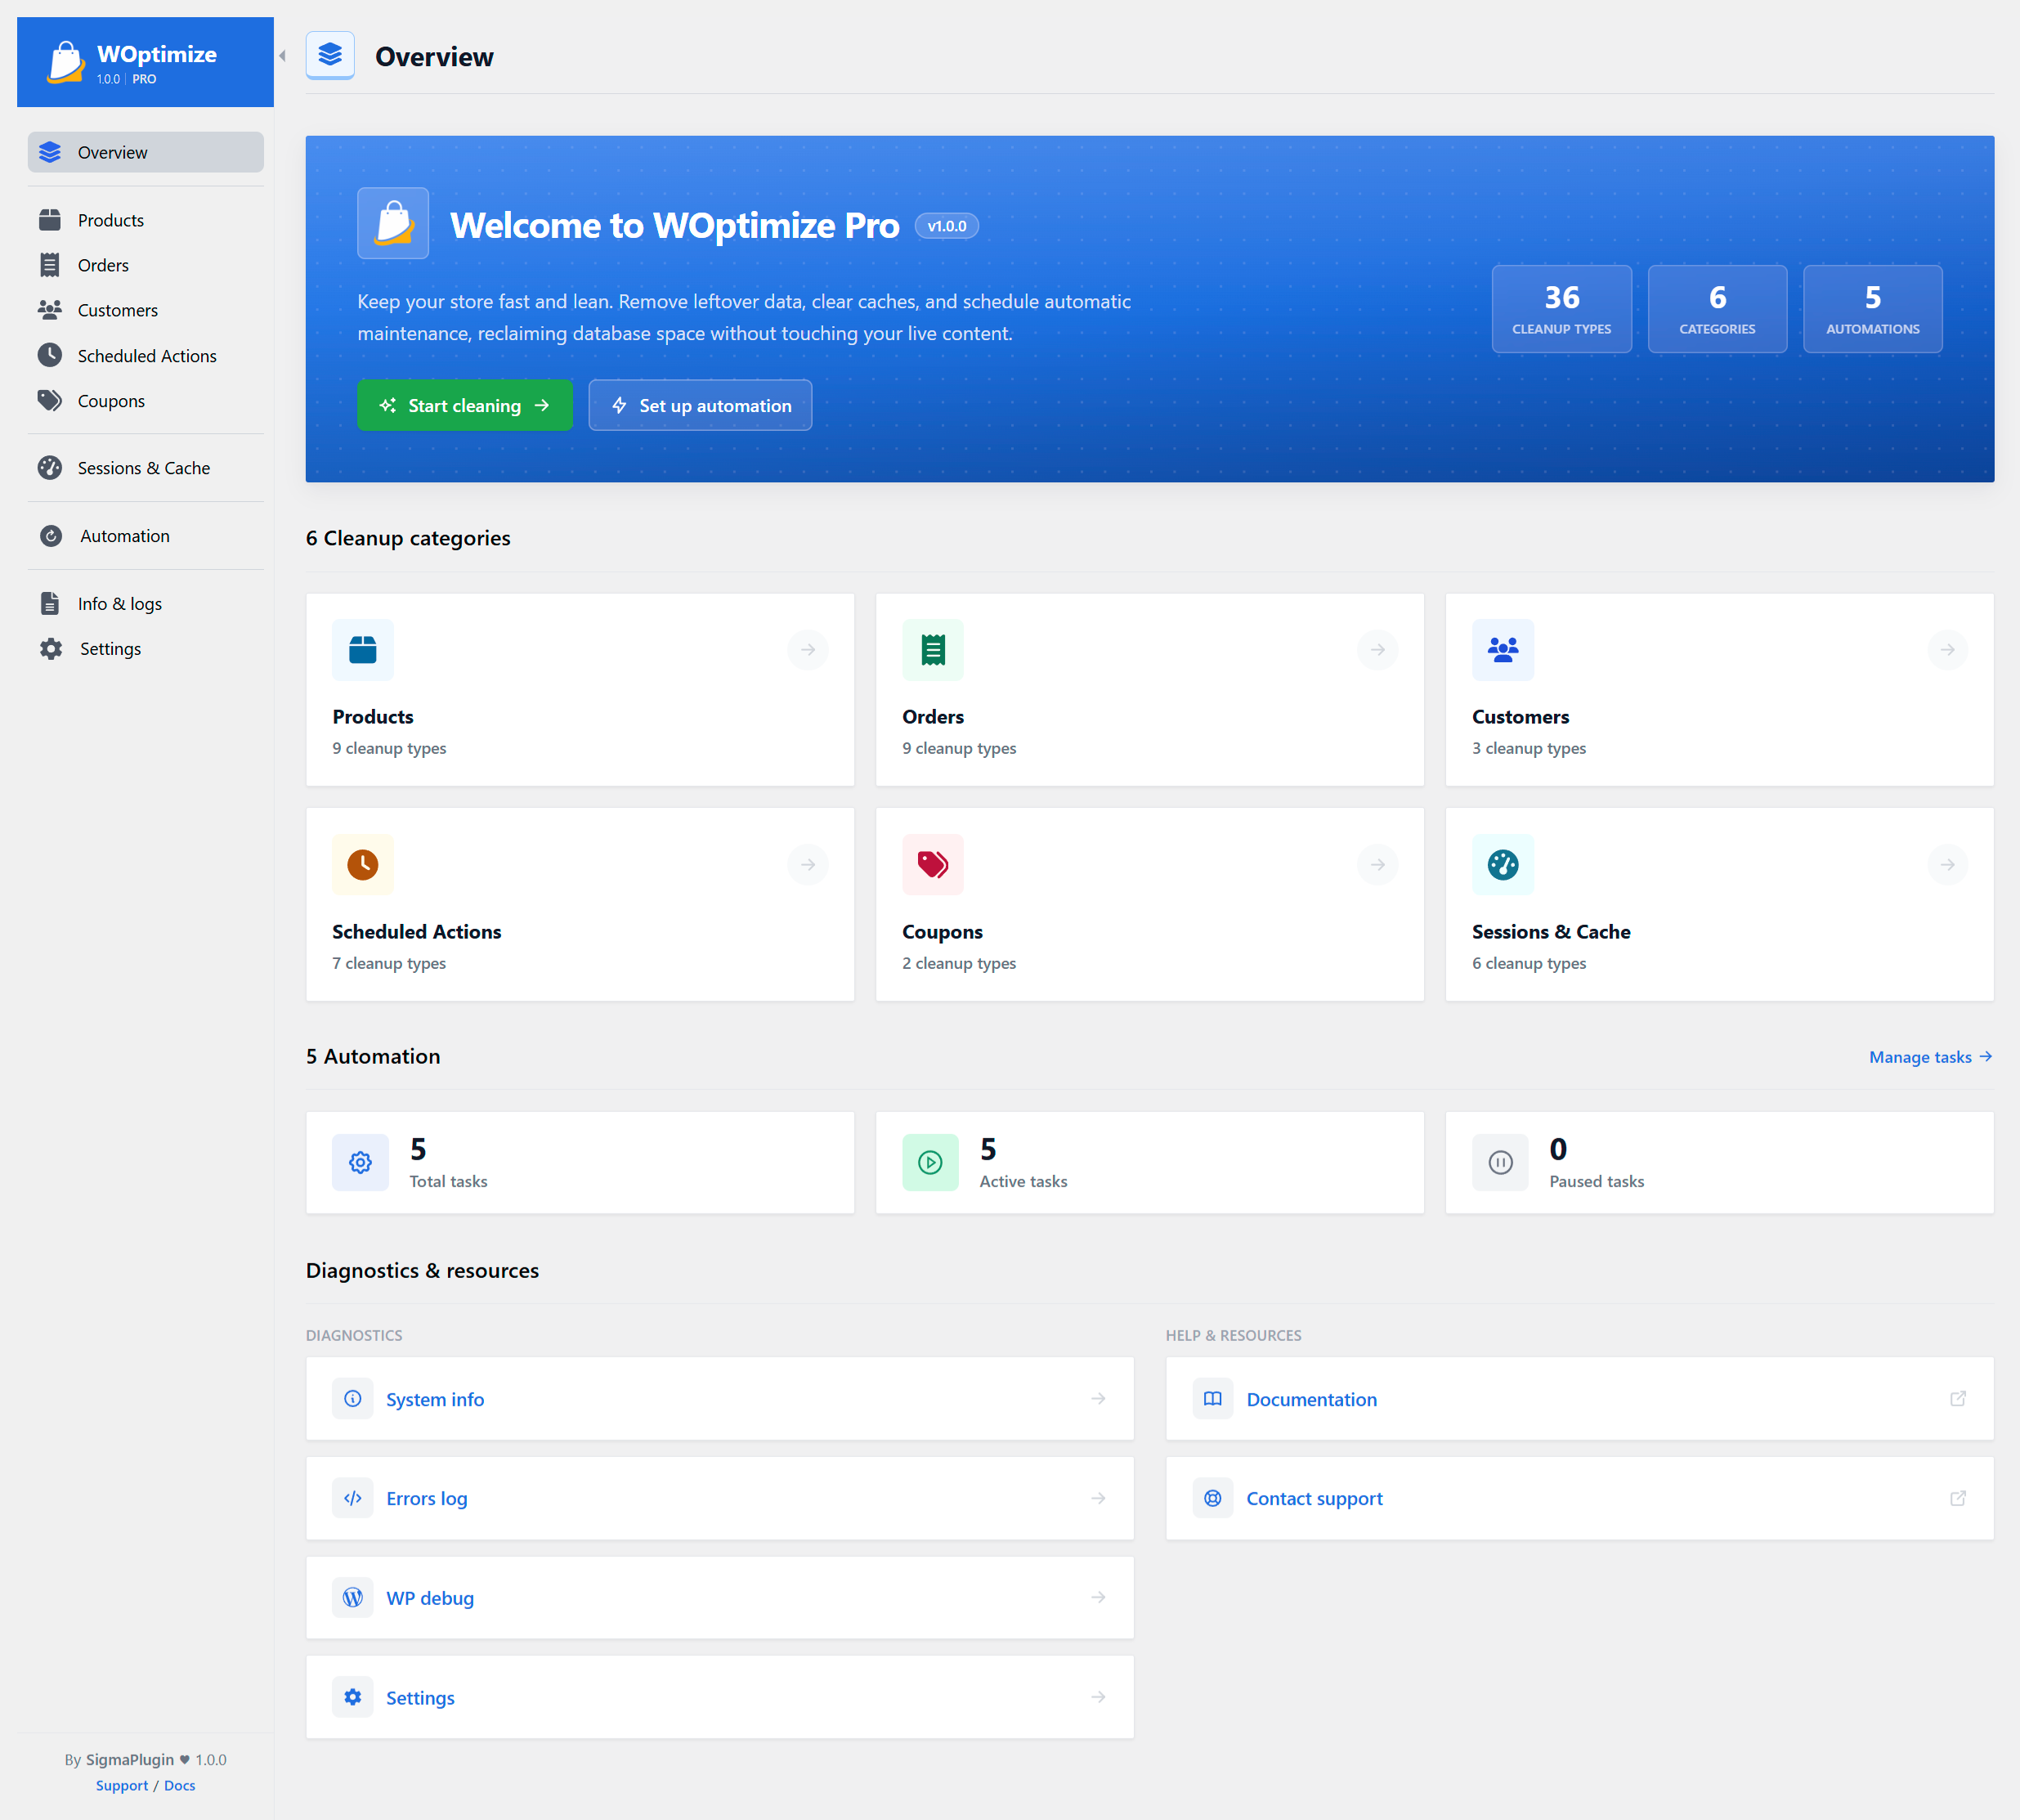
Overview
The Overview page summarizes:
- Available cleanup types and categories
- Total, active, and paused automation tasks
- Links to diagnostics, documentation, support, and settings
The cleanup categories are Products, Orders, Customers, Scheduled Actions, Coupons, and Sessions & Cache.
Cleanup Tabs
Most modules include a Cleanup tab containing data that is generally safe to remove, such as expired entries, logs, cached data, and orphaned records.
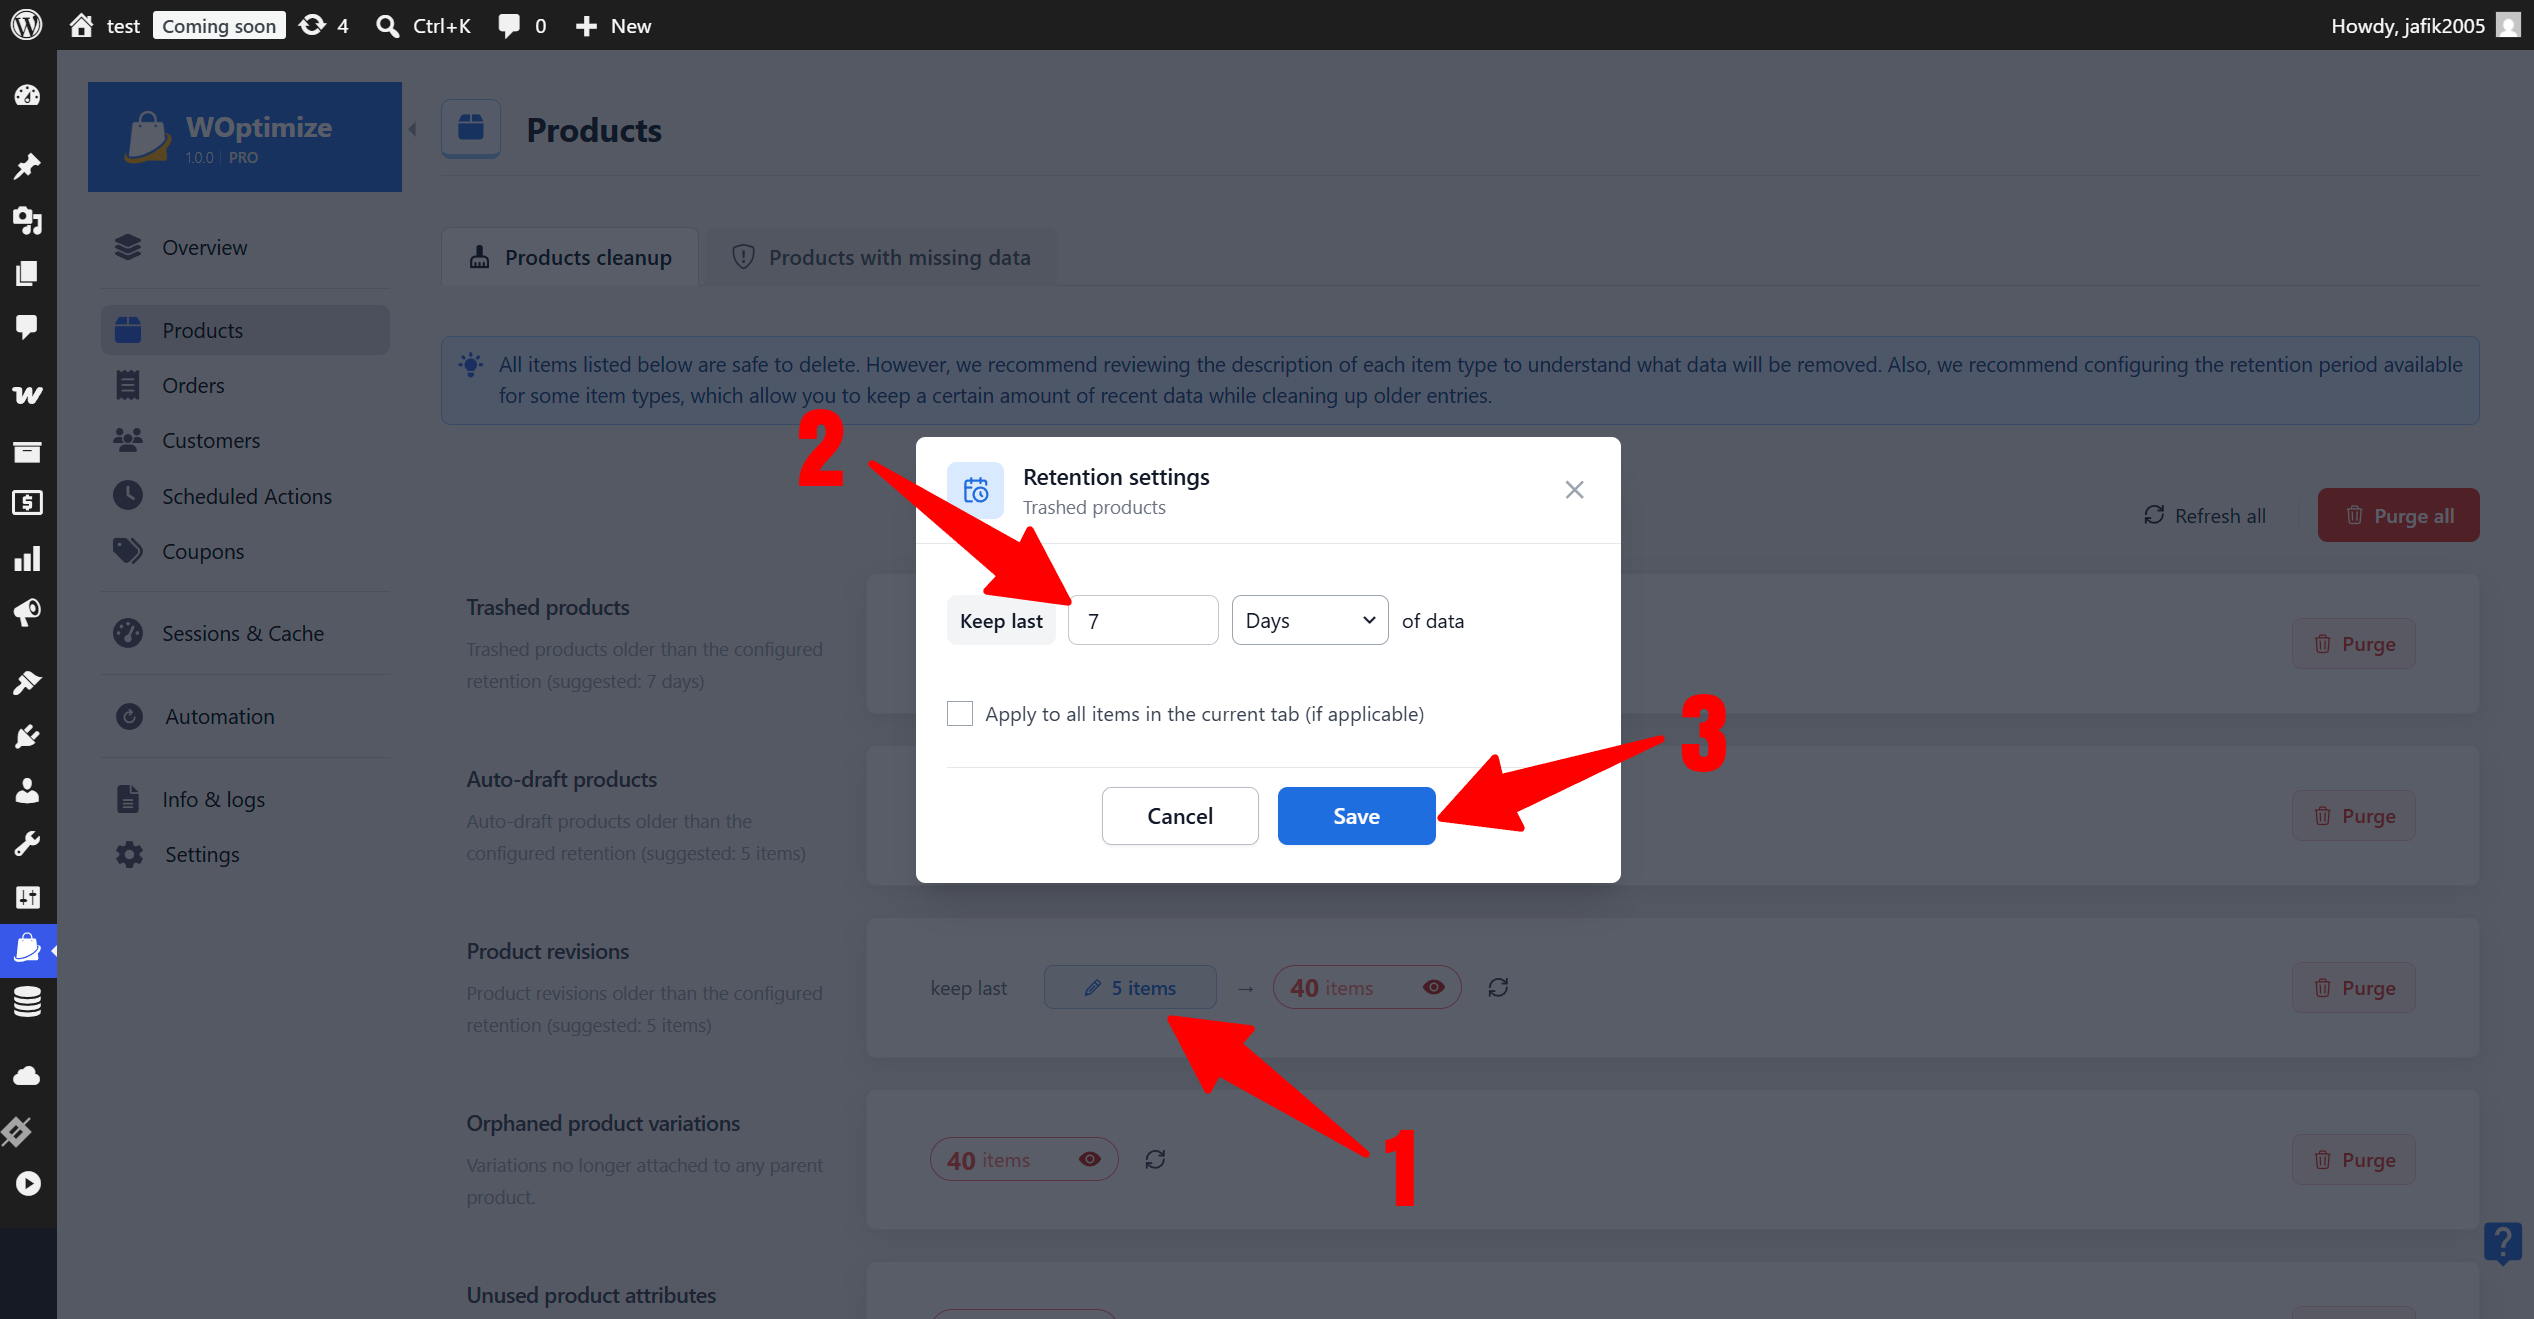
For cleanup types based on age, woptimize applies recommended retention periods by default. You can change these periods at any time.
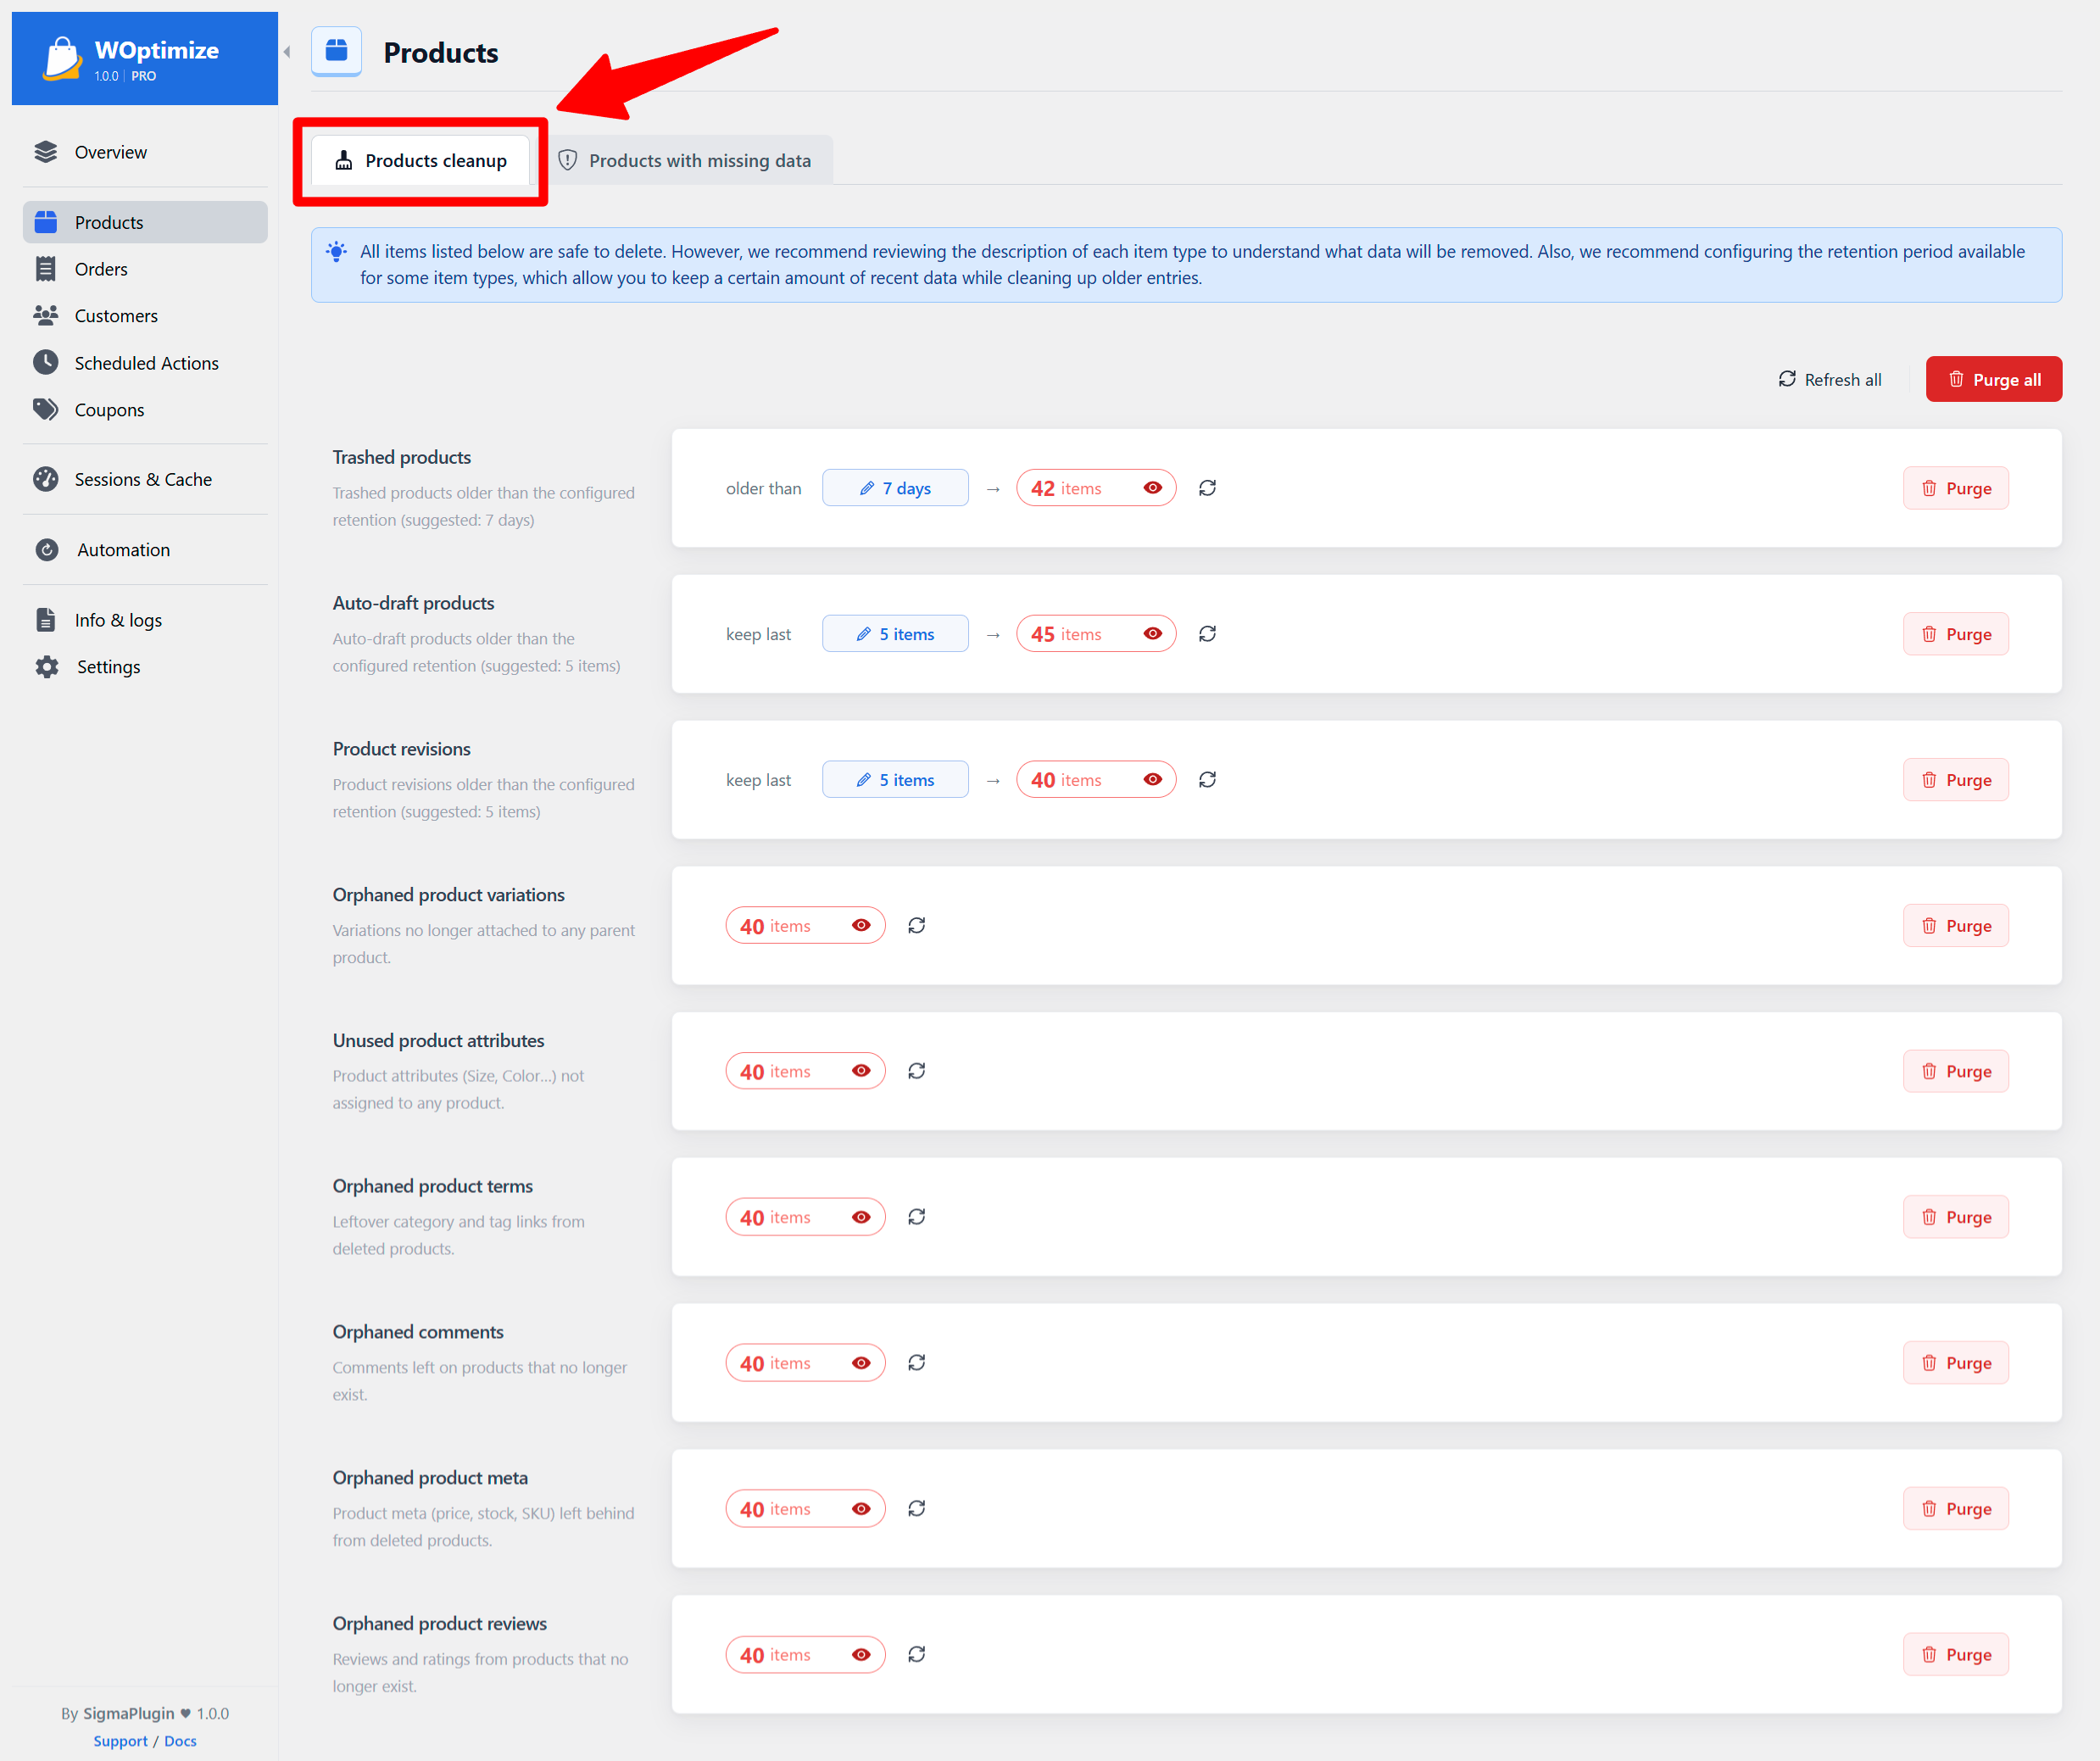
To clean an item:
- Set the desired retention period, when available.
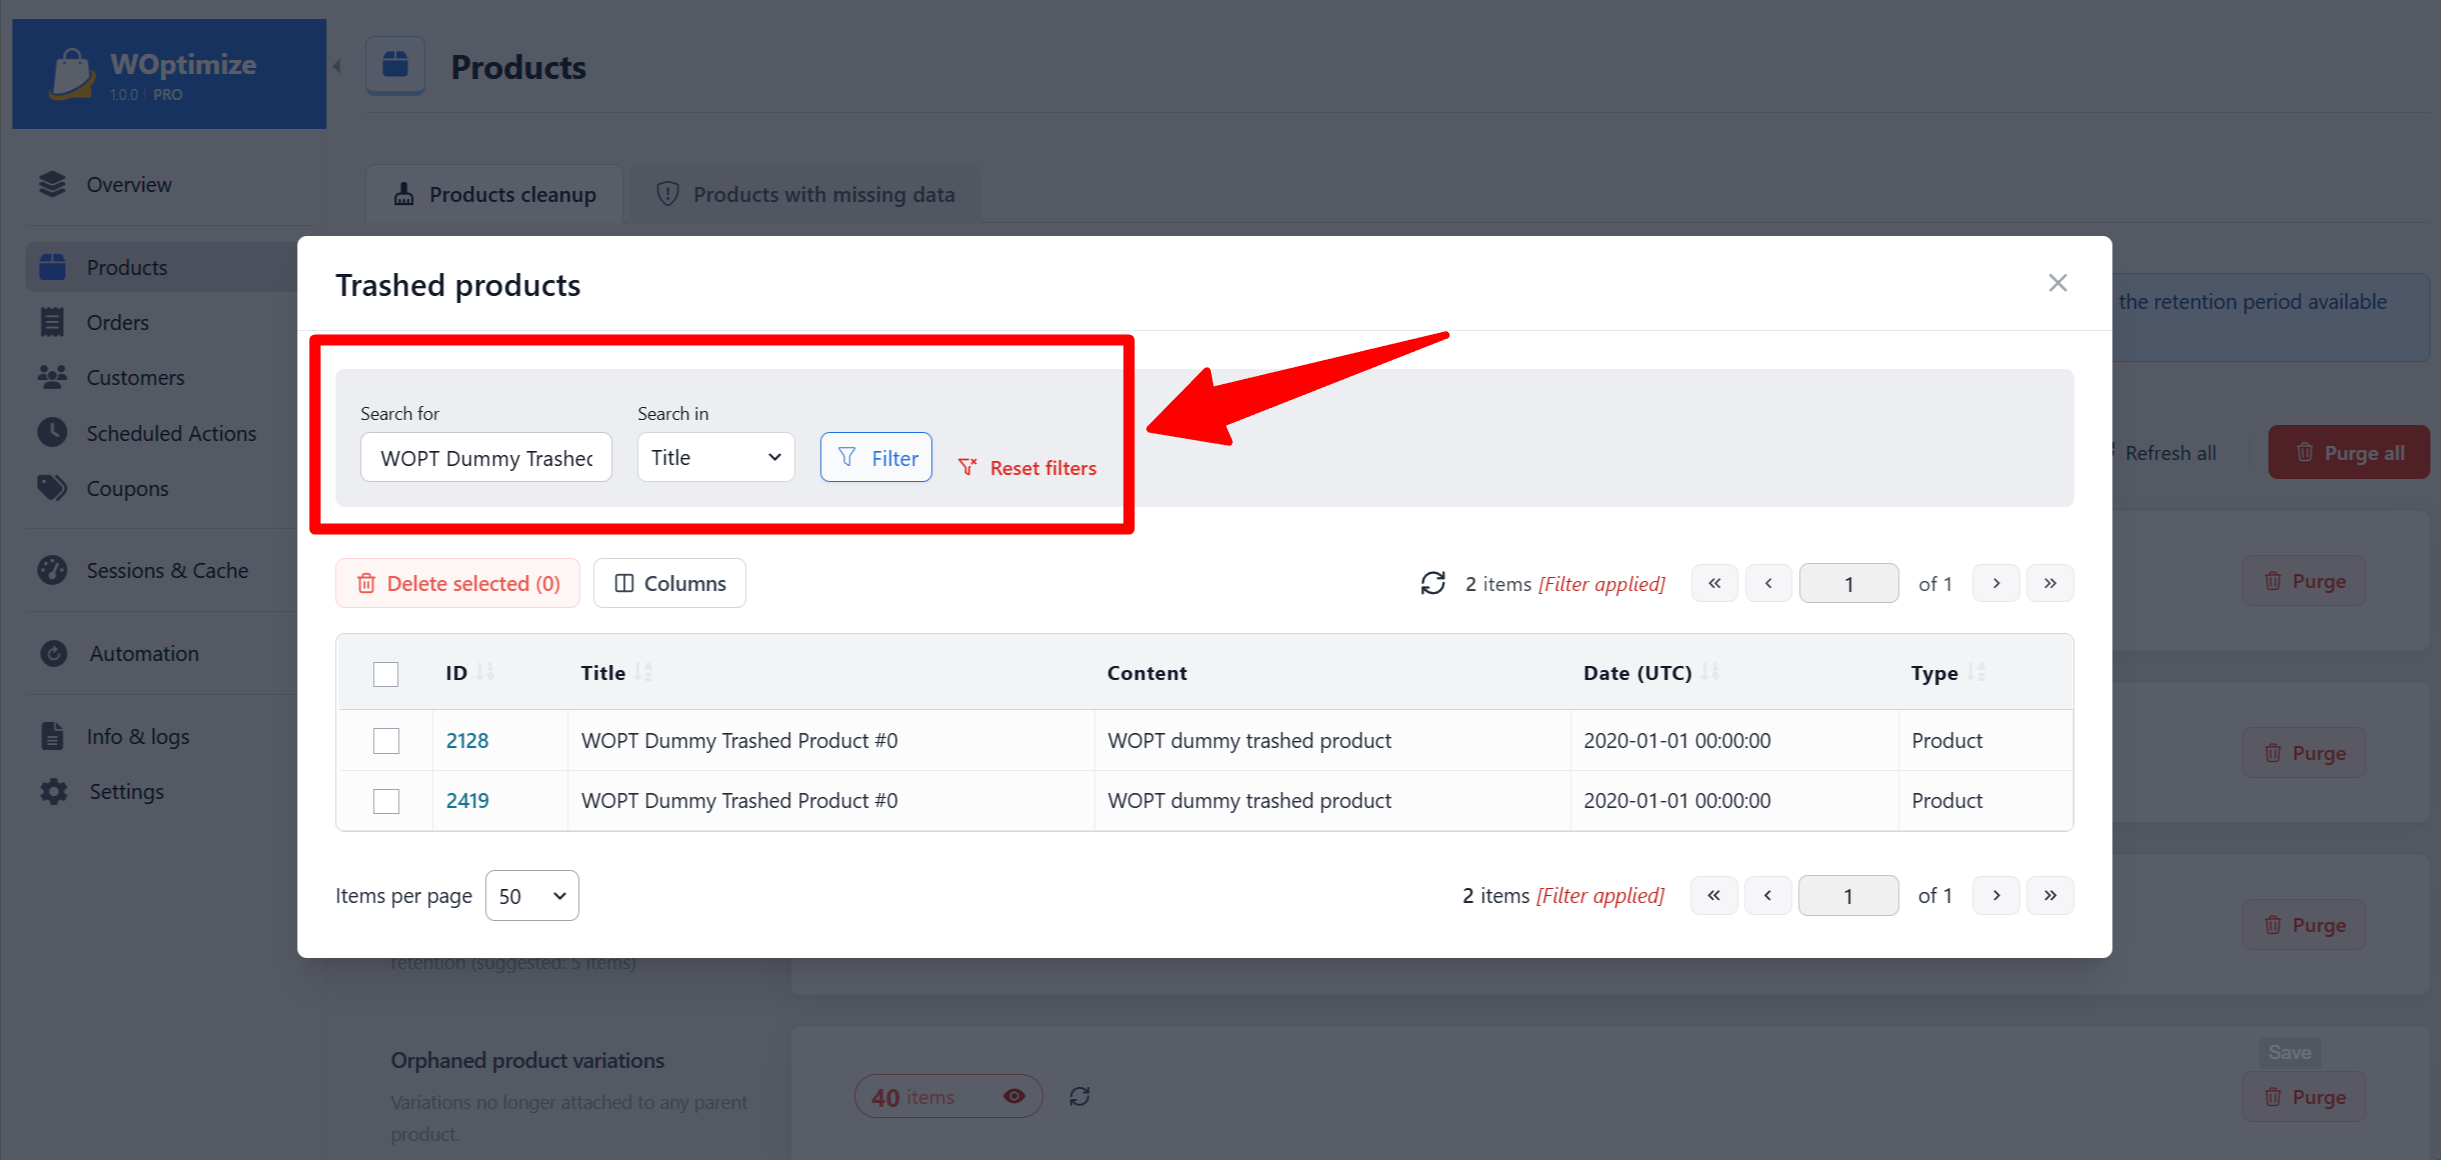
- Click the item count to preview the detected entries.
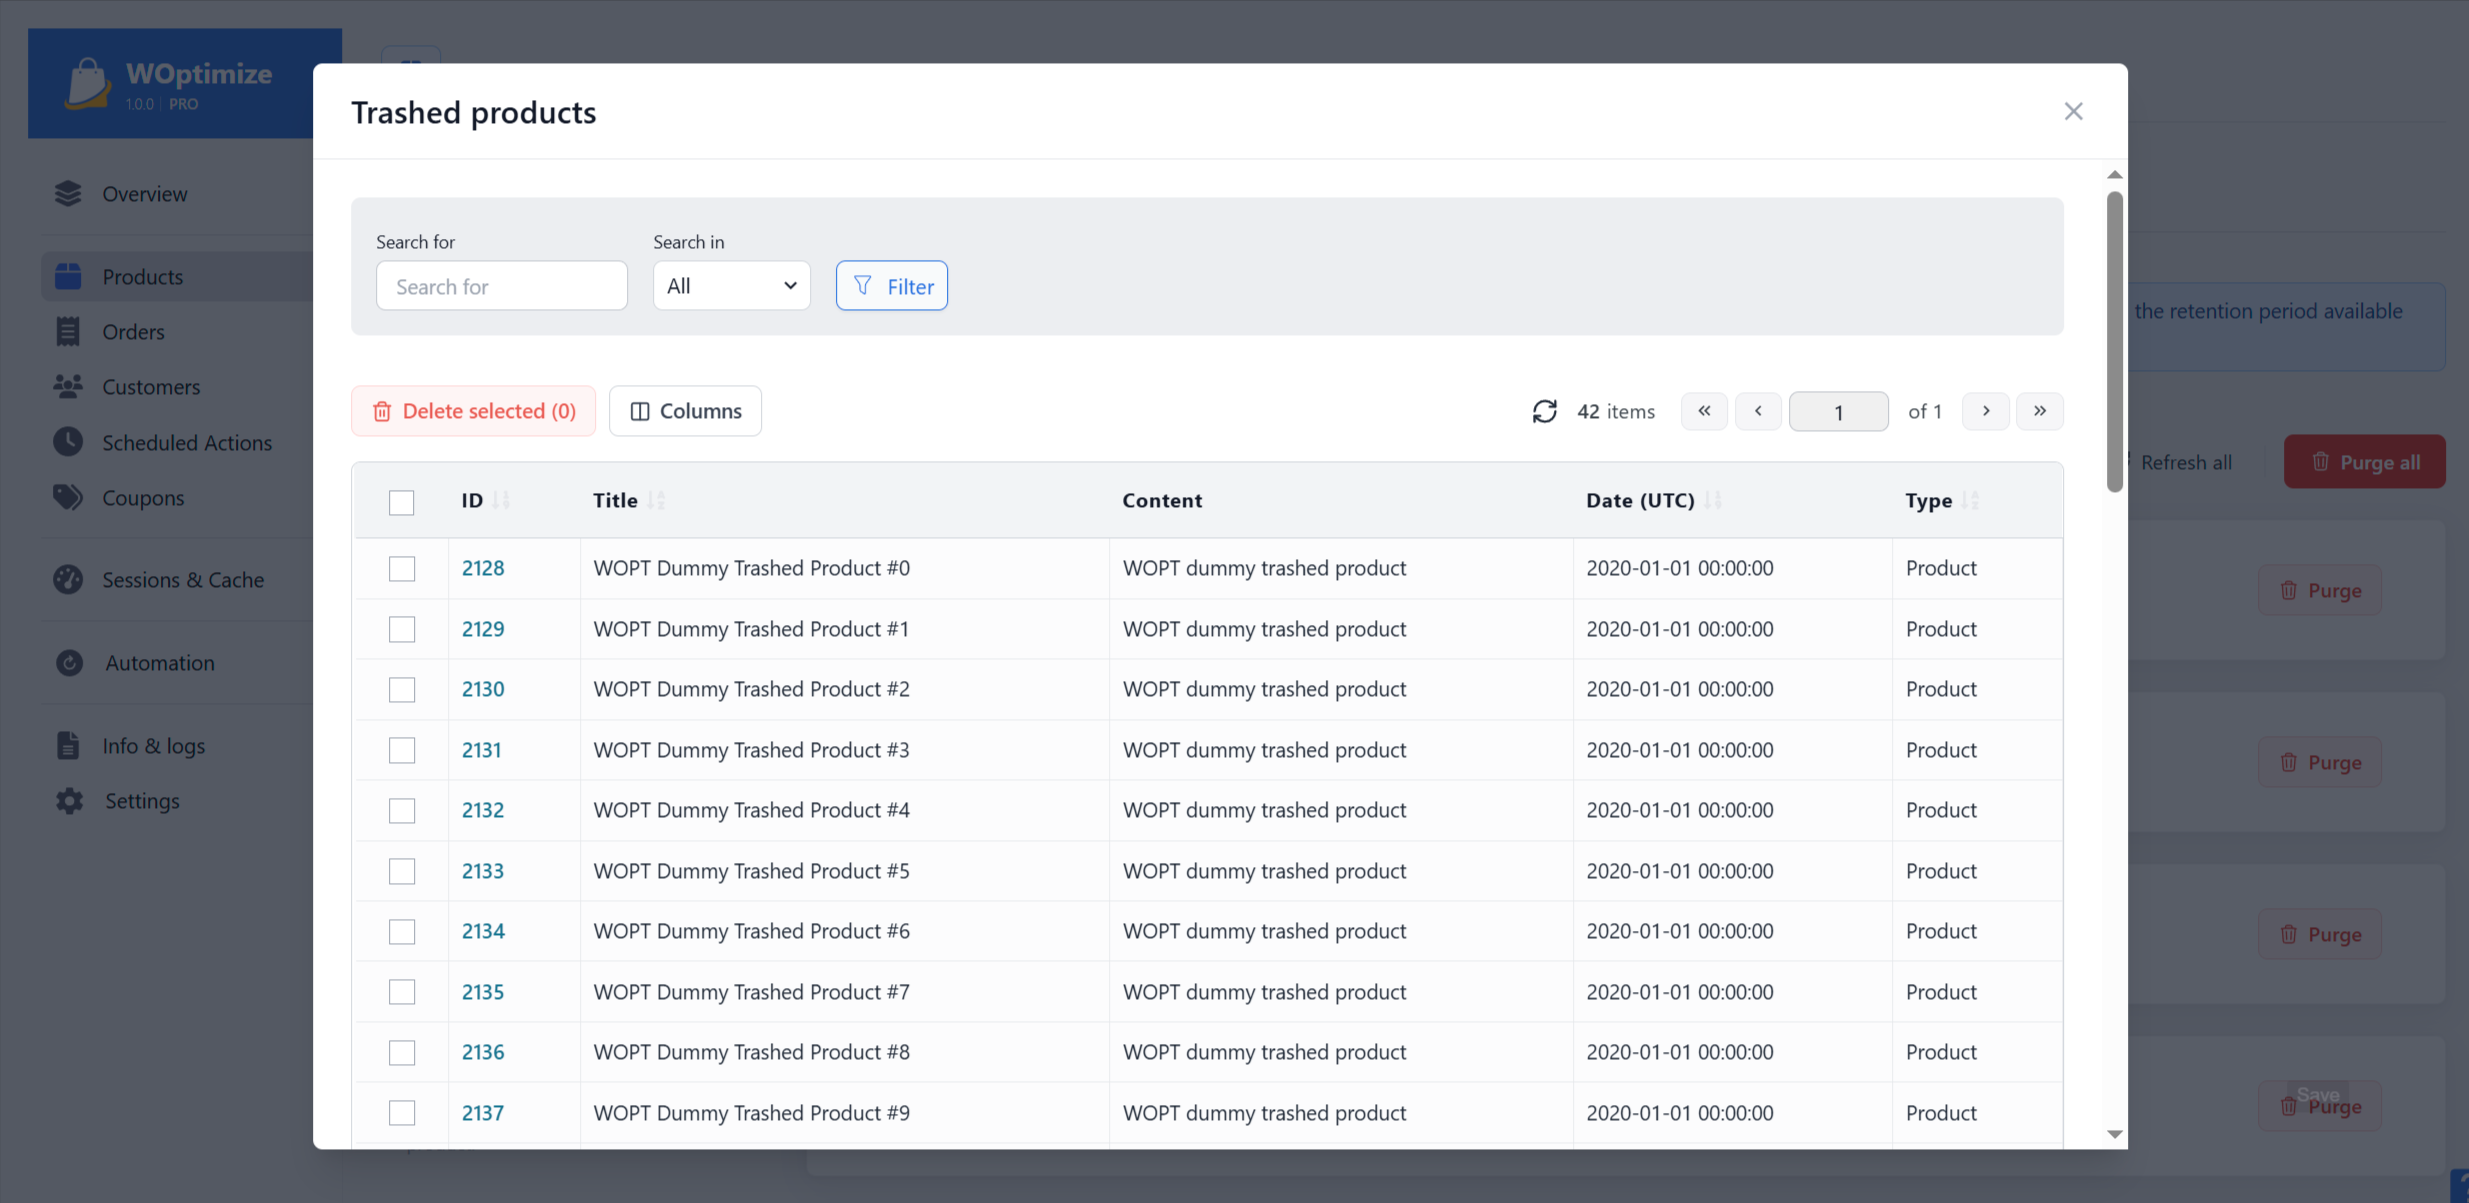
- Search, filter, and inspect the results.
- Optionally delete selected entries from the preview.
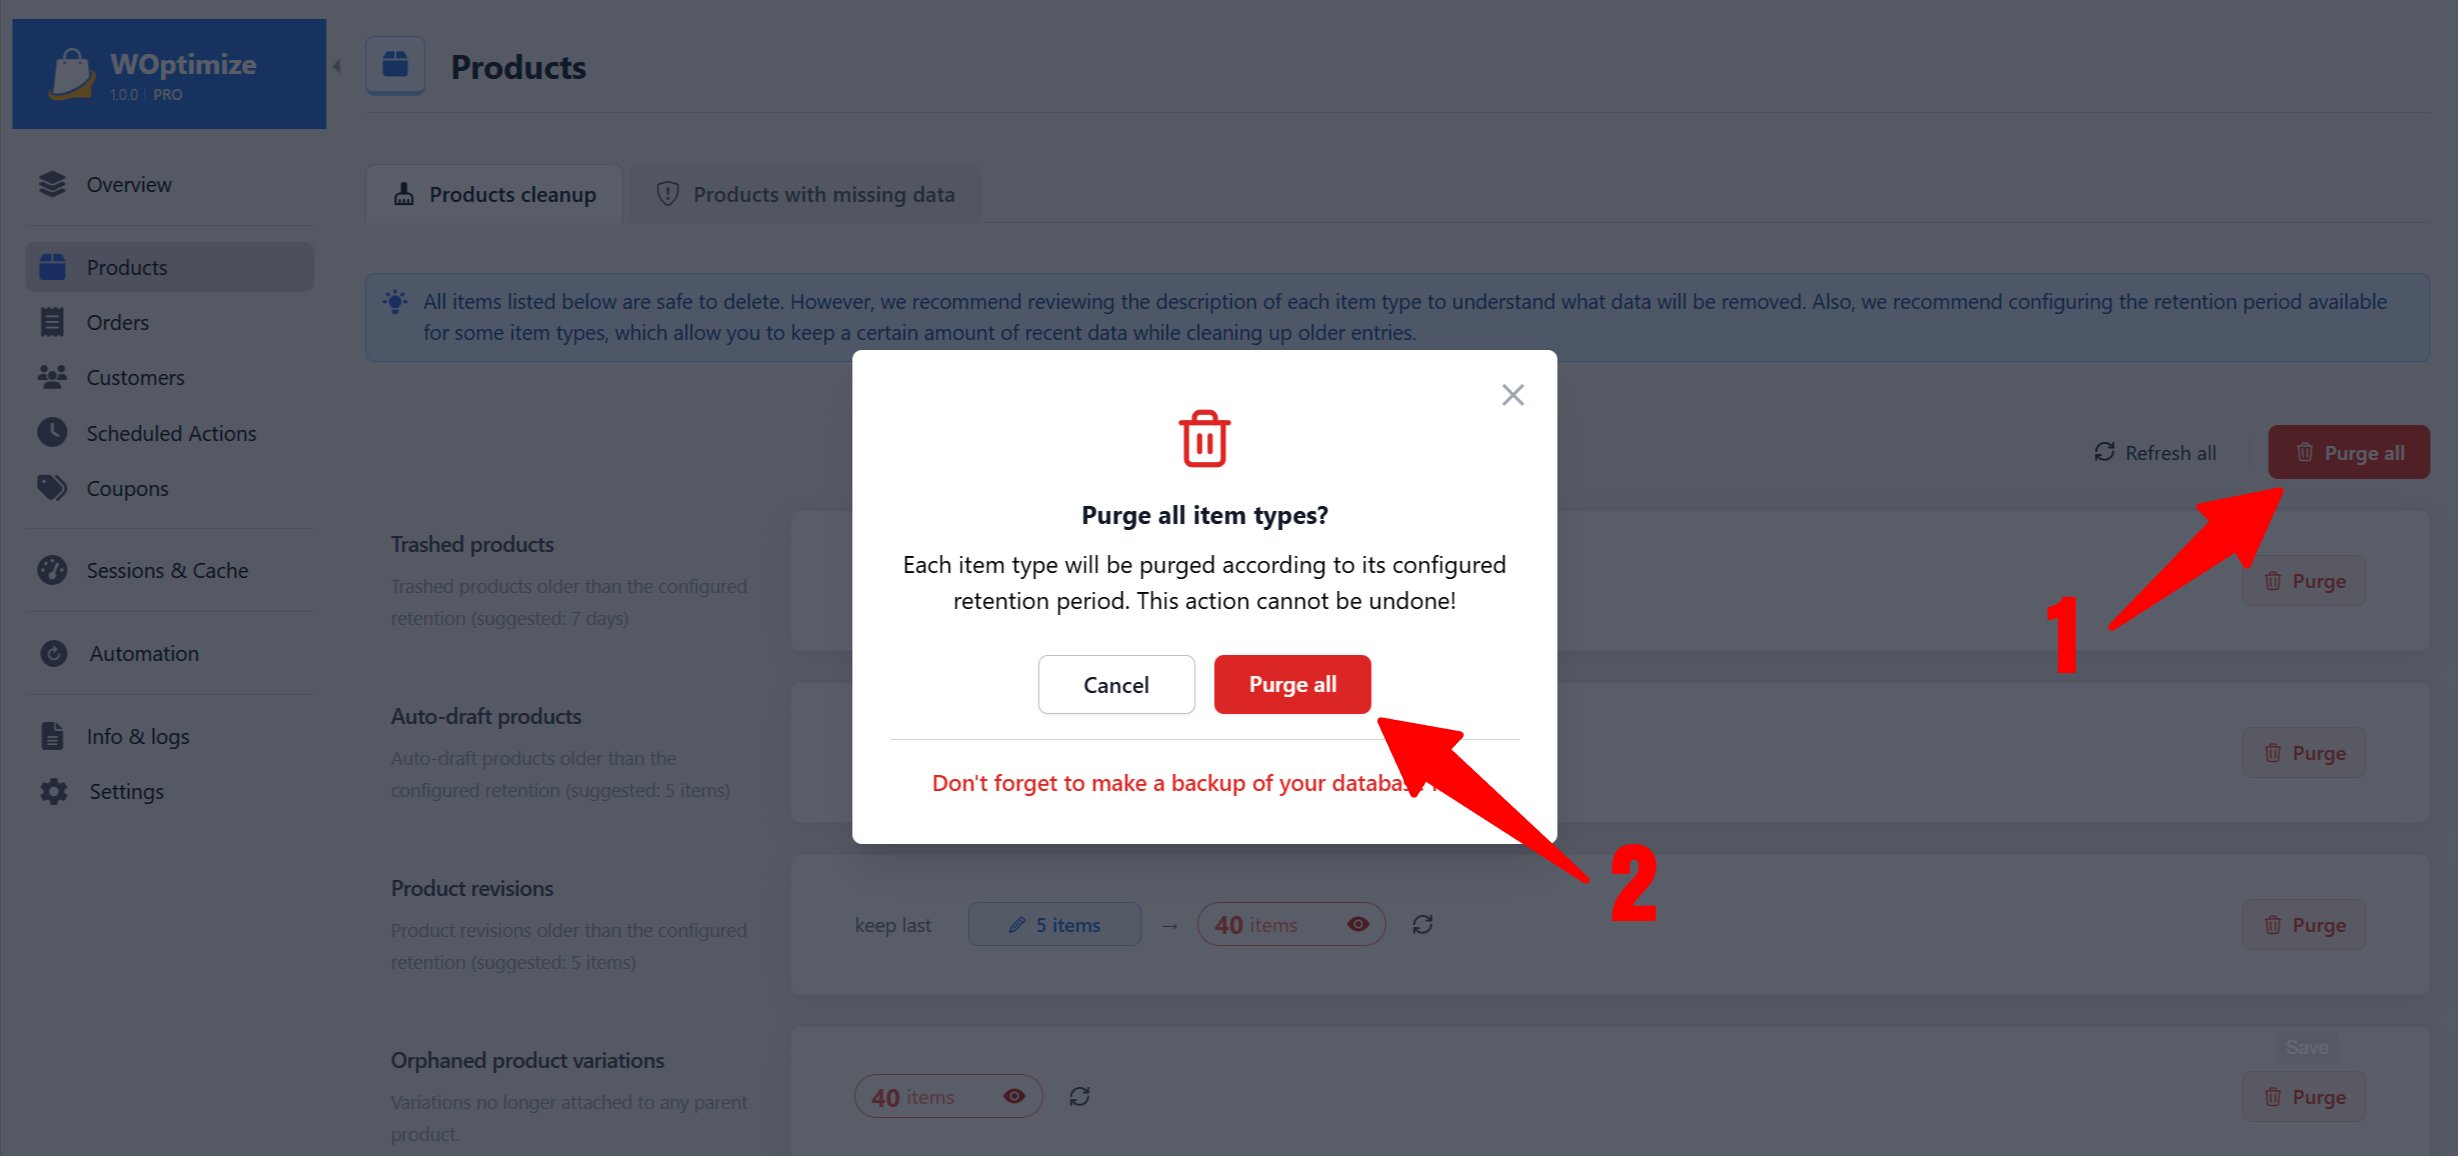
- Return to the cleanup tab and click Purge.
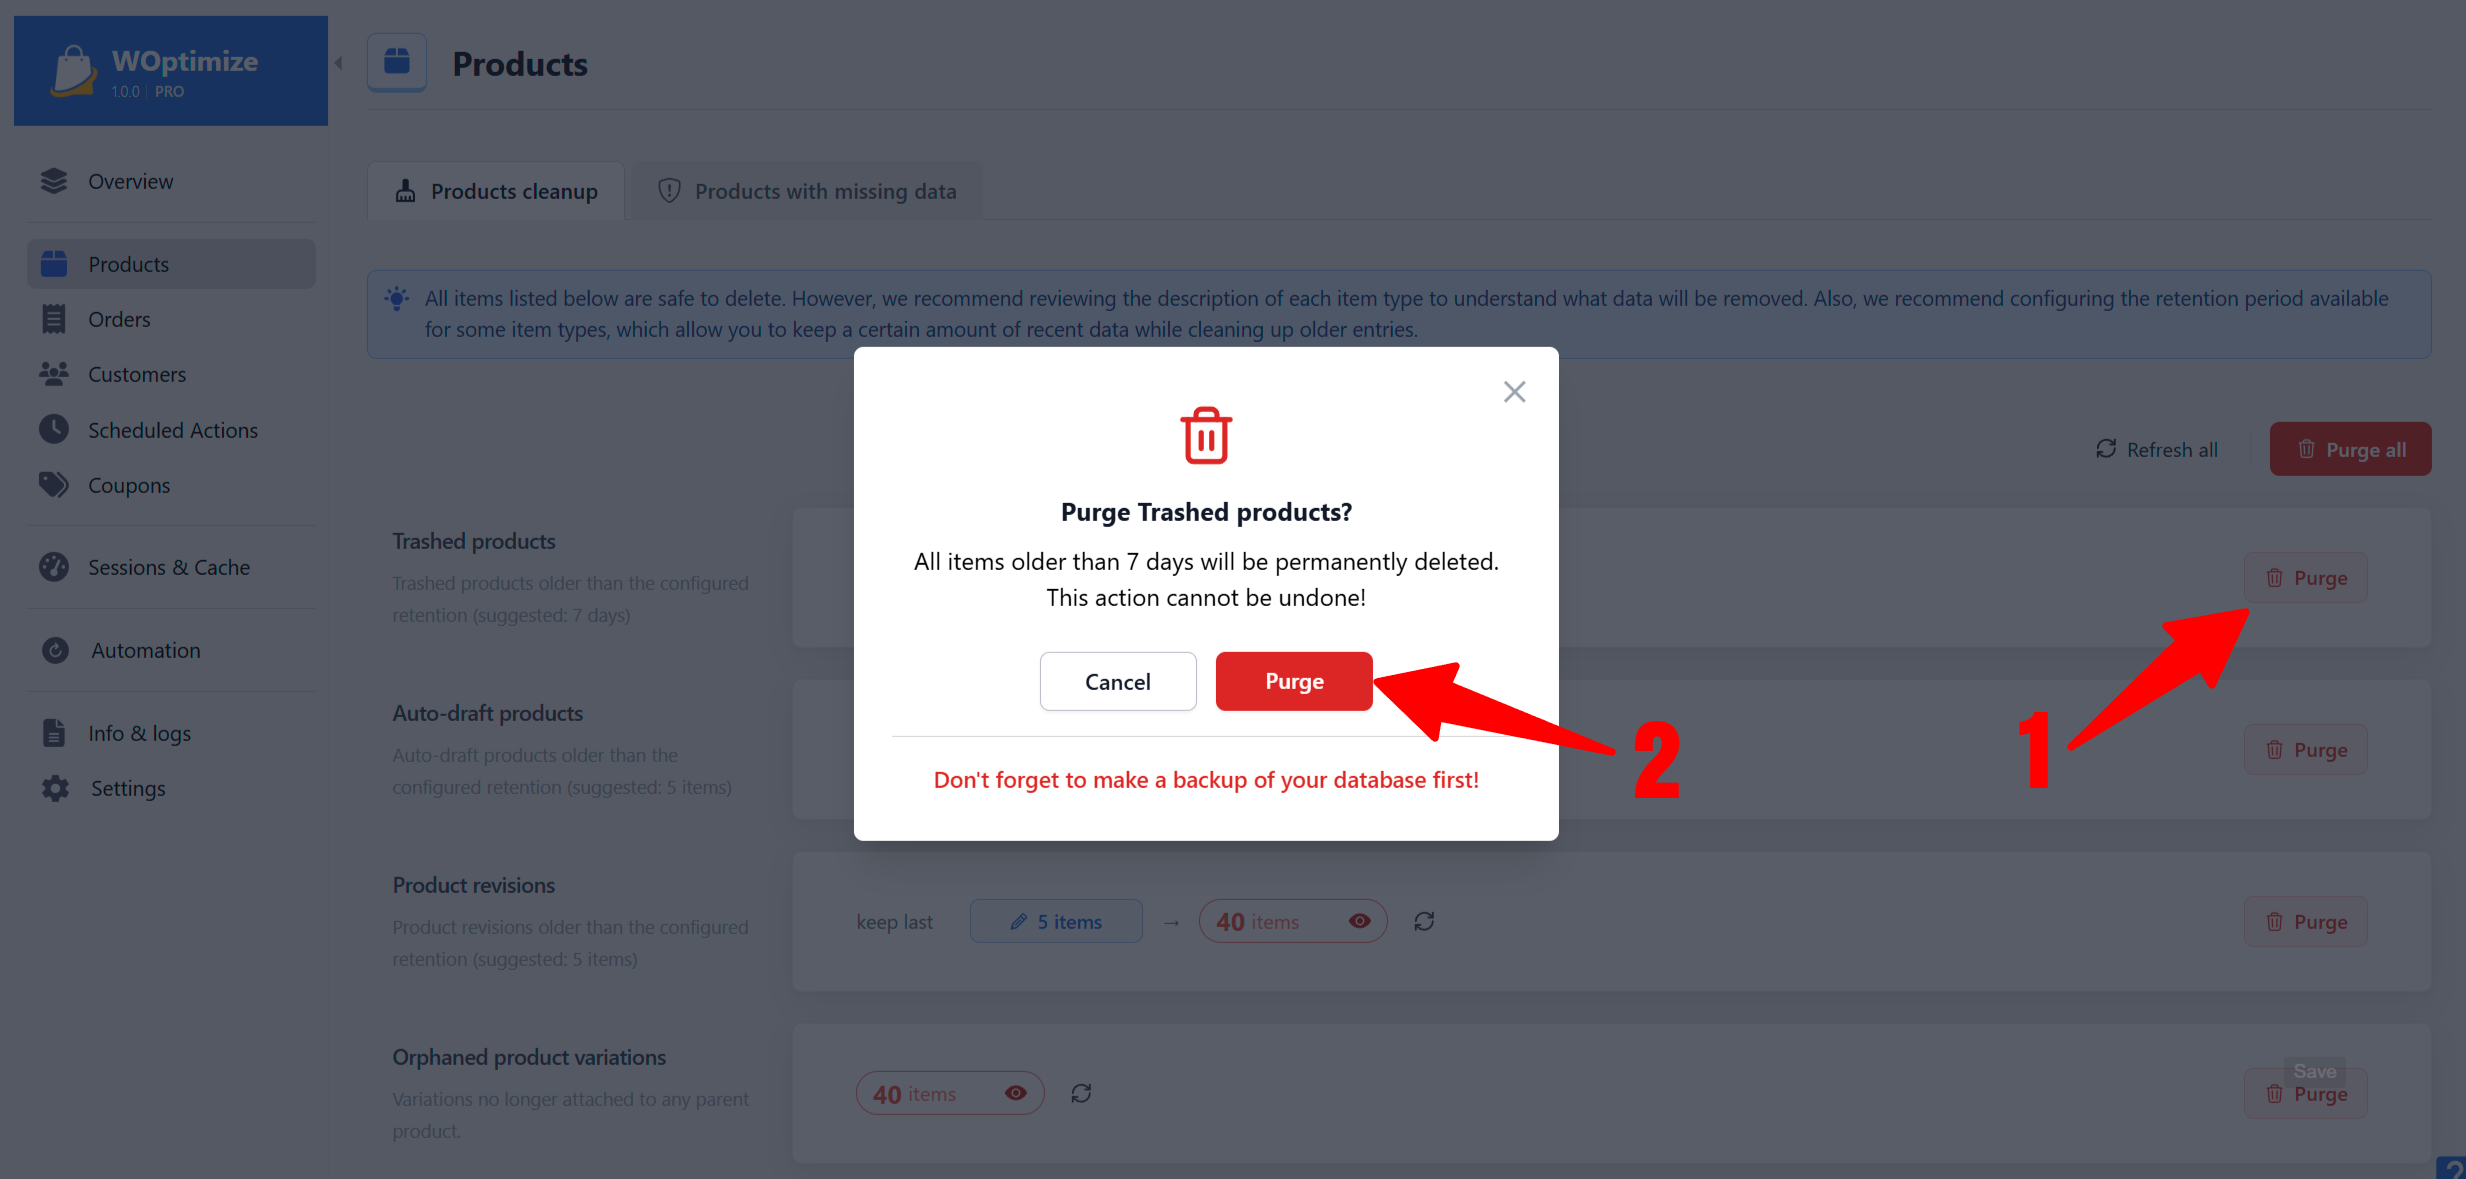
Use Purge all to clean all available cleanup types in the current module.
Diagnostic Tabs
Products, Orders, and Customers also contain diagnostic tabs:
- Products with missing data
- Orders with missing user
- Inactive customers
Unlike cleanup tabs, these sections contain valid WooCommerce records that may require investigation.
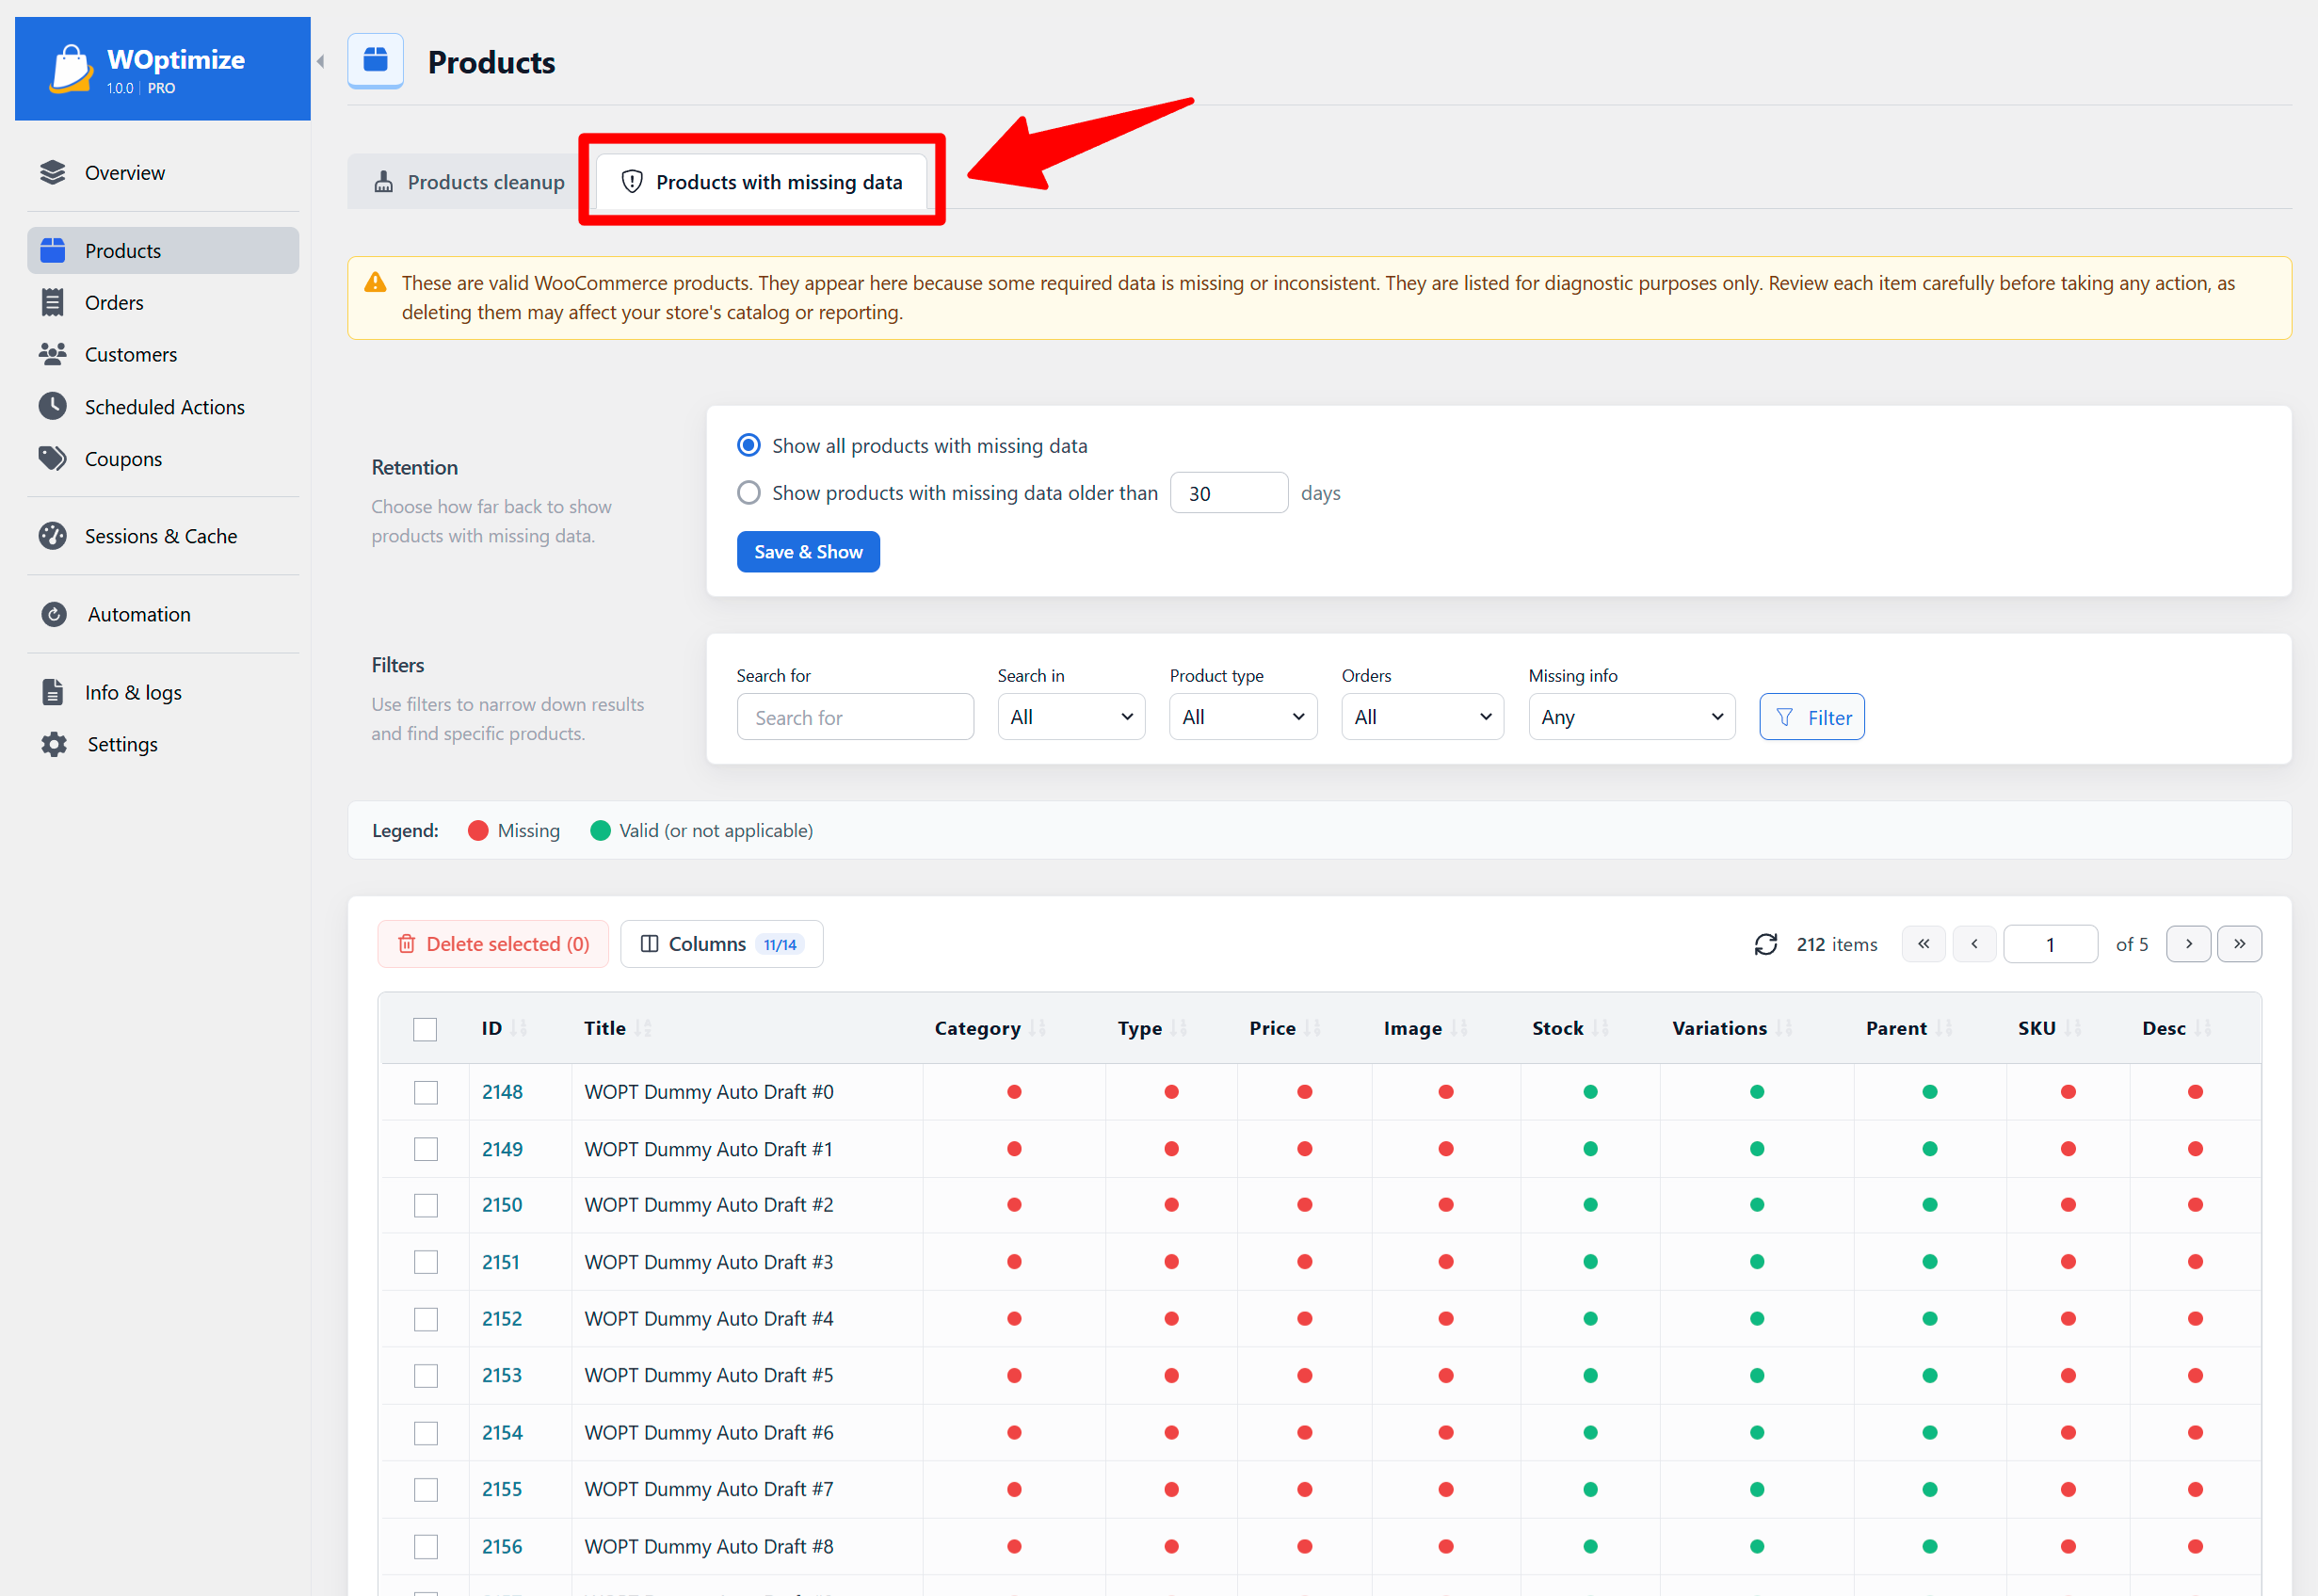
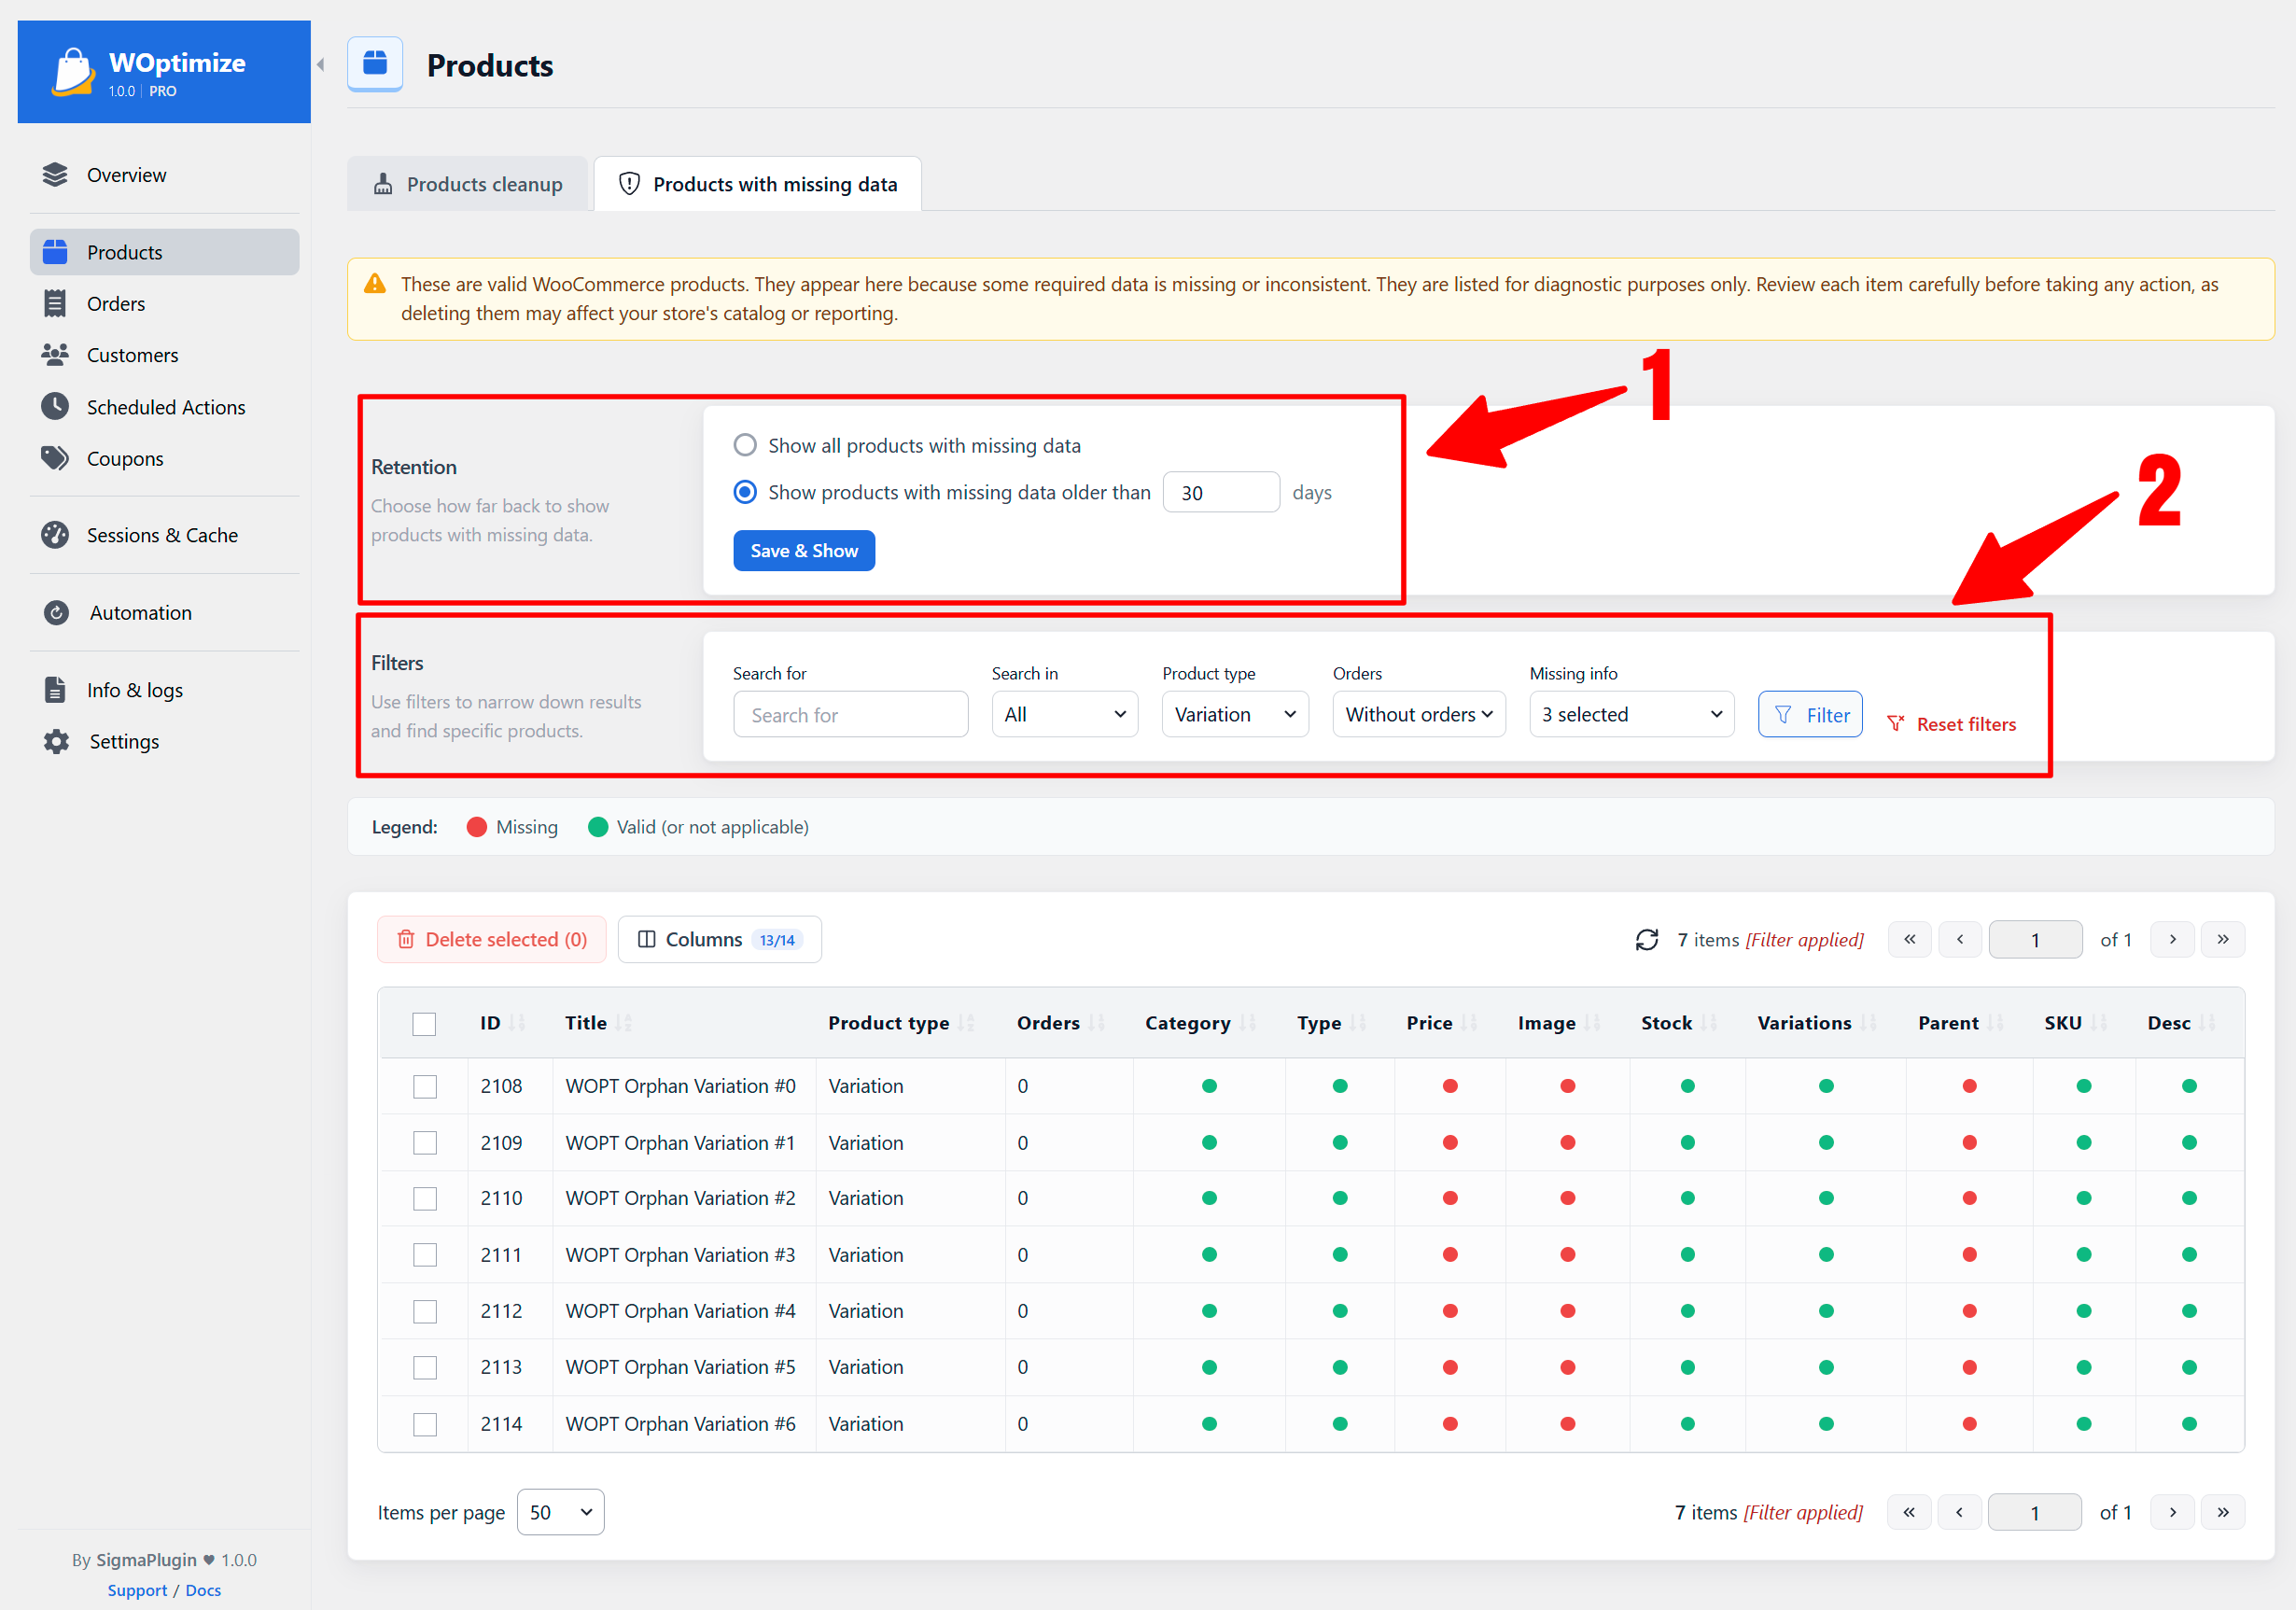
Use the available retention settings, filters, search fields, and sortable columns to inspect them.
Only delete diagnostic items when you understand why they appear and are certain they are no longer required. Removing them may affect your catalog, customers, order history, or reports.

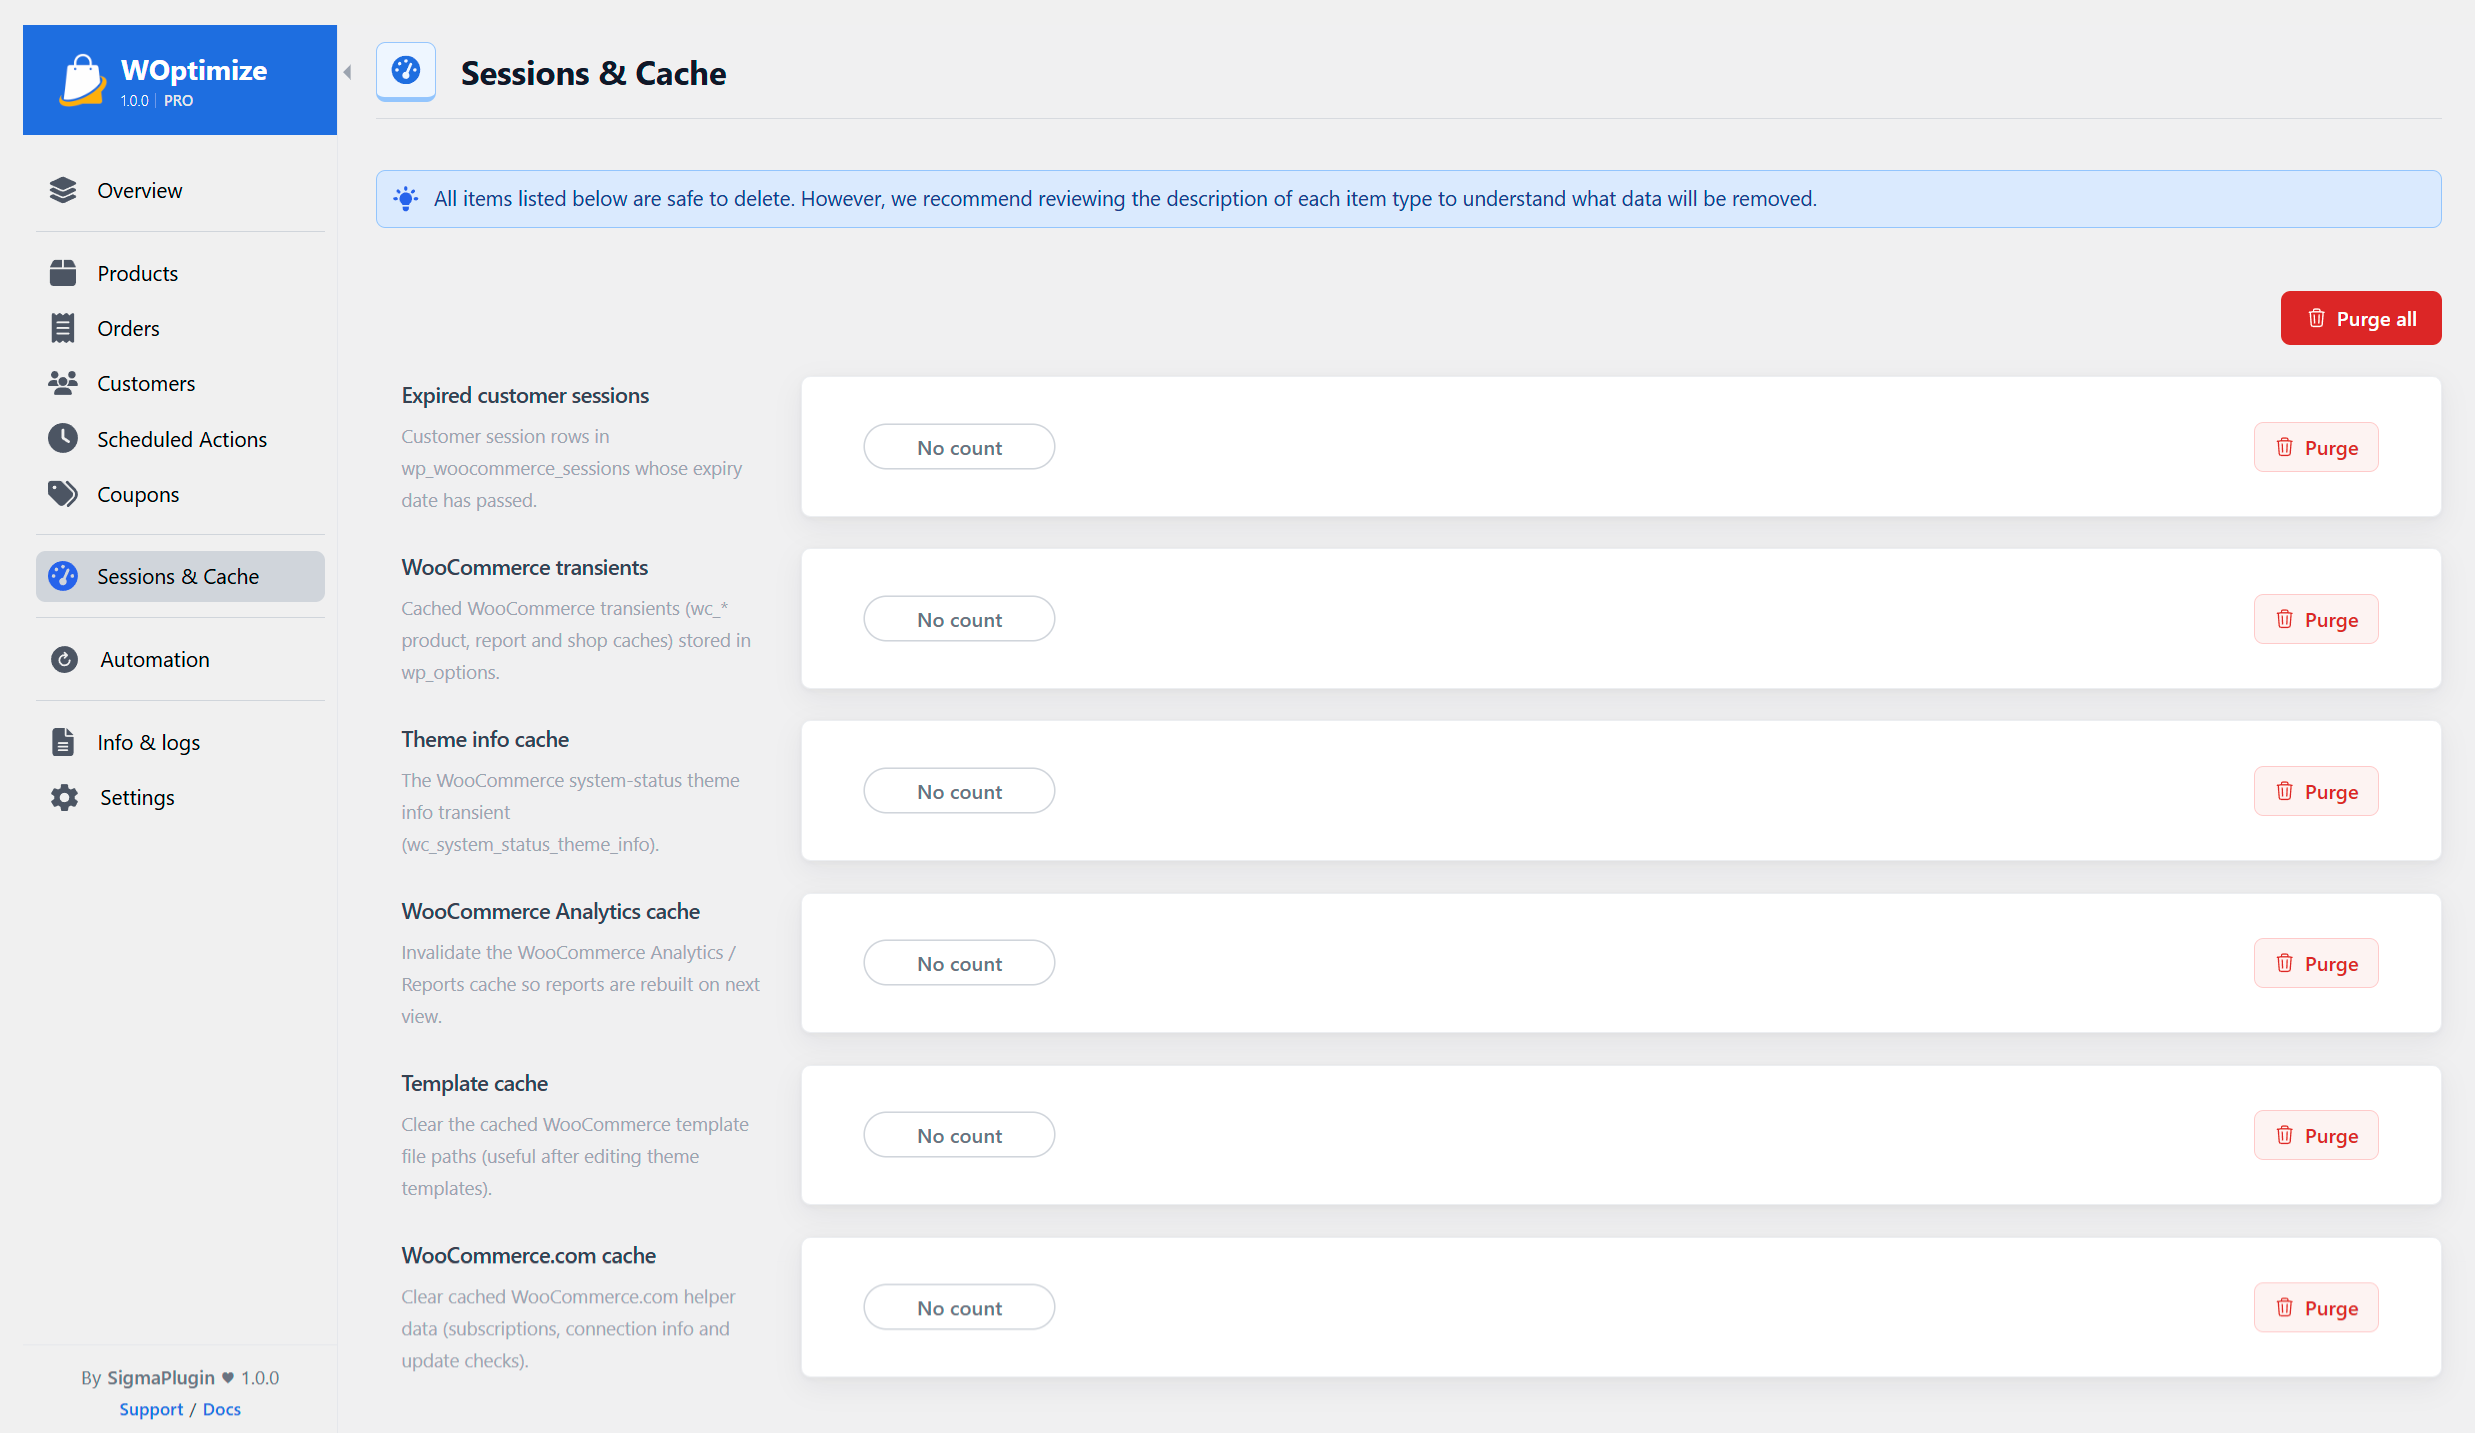
Sessions & Cache
The Sessions & Cache module provides one-click purge actions for WooCommerce sessions and caches.
These tools do not display counts or detailed previews because the cached data can be regenerated by WooCommerce when needed.
Automation
Automation allows woptimize to perform recurring cleanup tasks without requiring you to run each cleanup manually. The Automation page displays all configured tasks and shows their status, schedule, previous run, next run, and selected cleanup items.

Creating an Automation
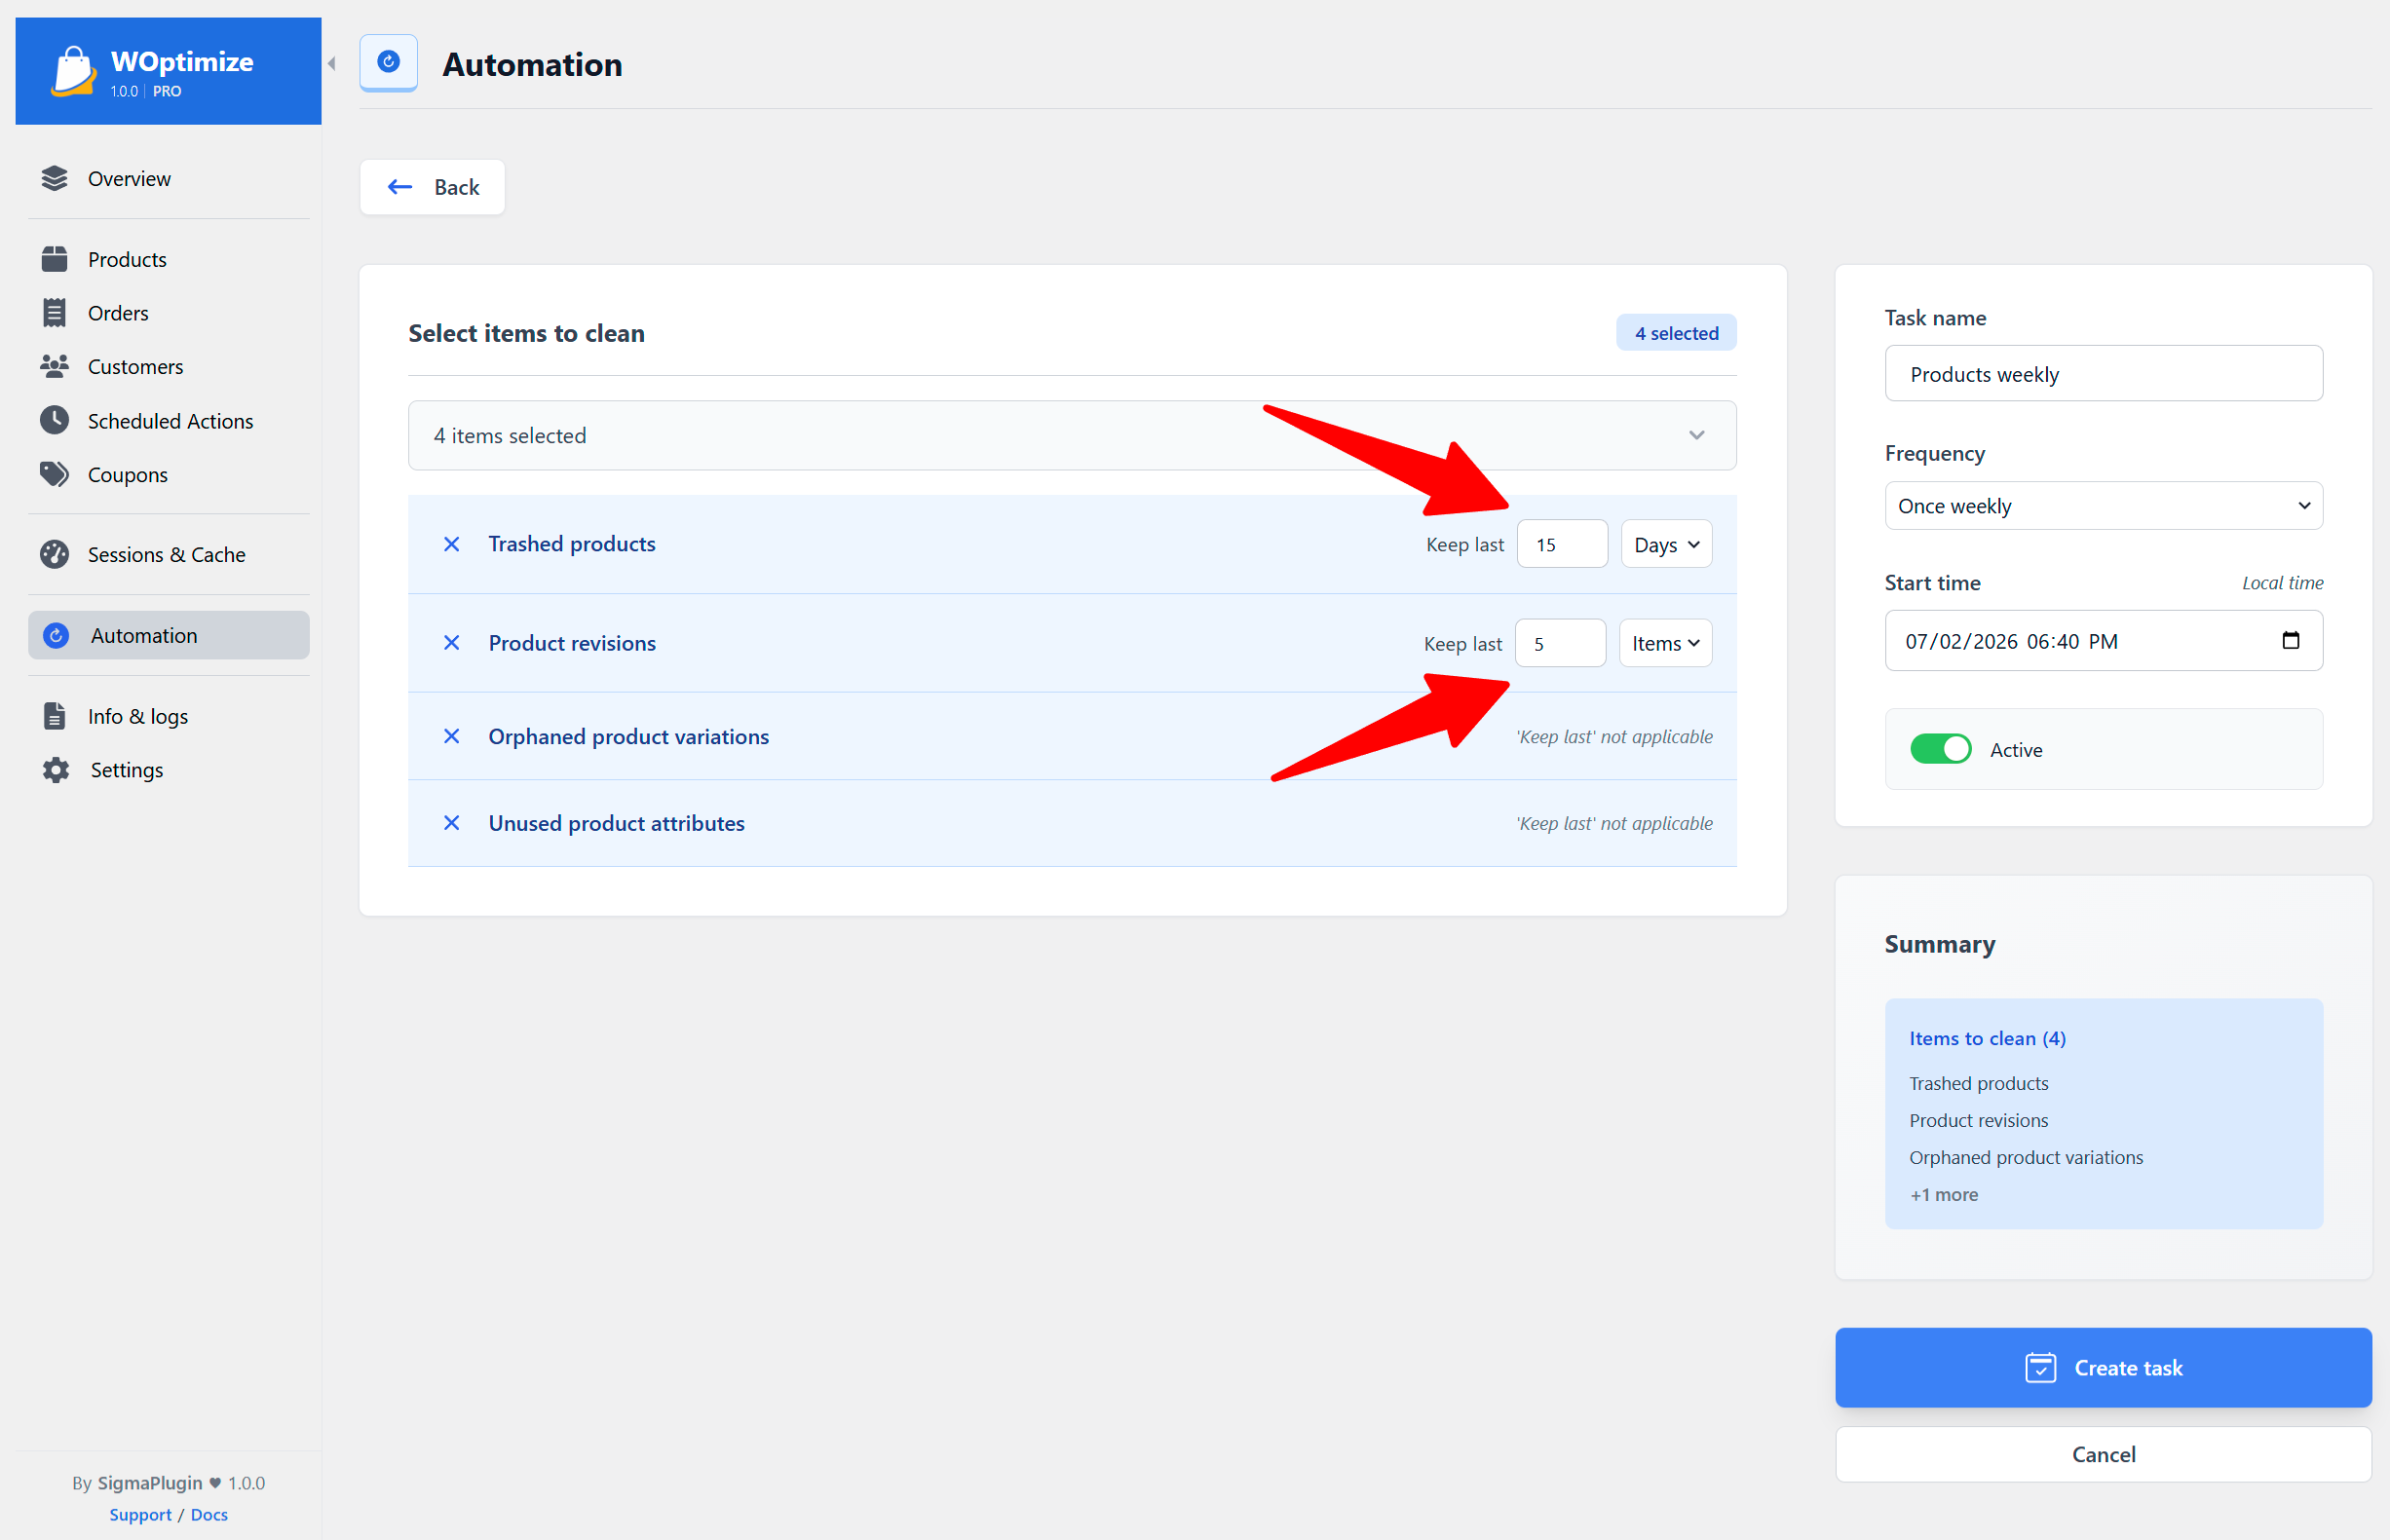
Click New automated task, then complete the following steps:
-
Choose the cleanup items
Select the cleanup types that the automation should process.

-
Configure retention rules
Adjust the retention period for supported items to determine how much recent data should be preserved.
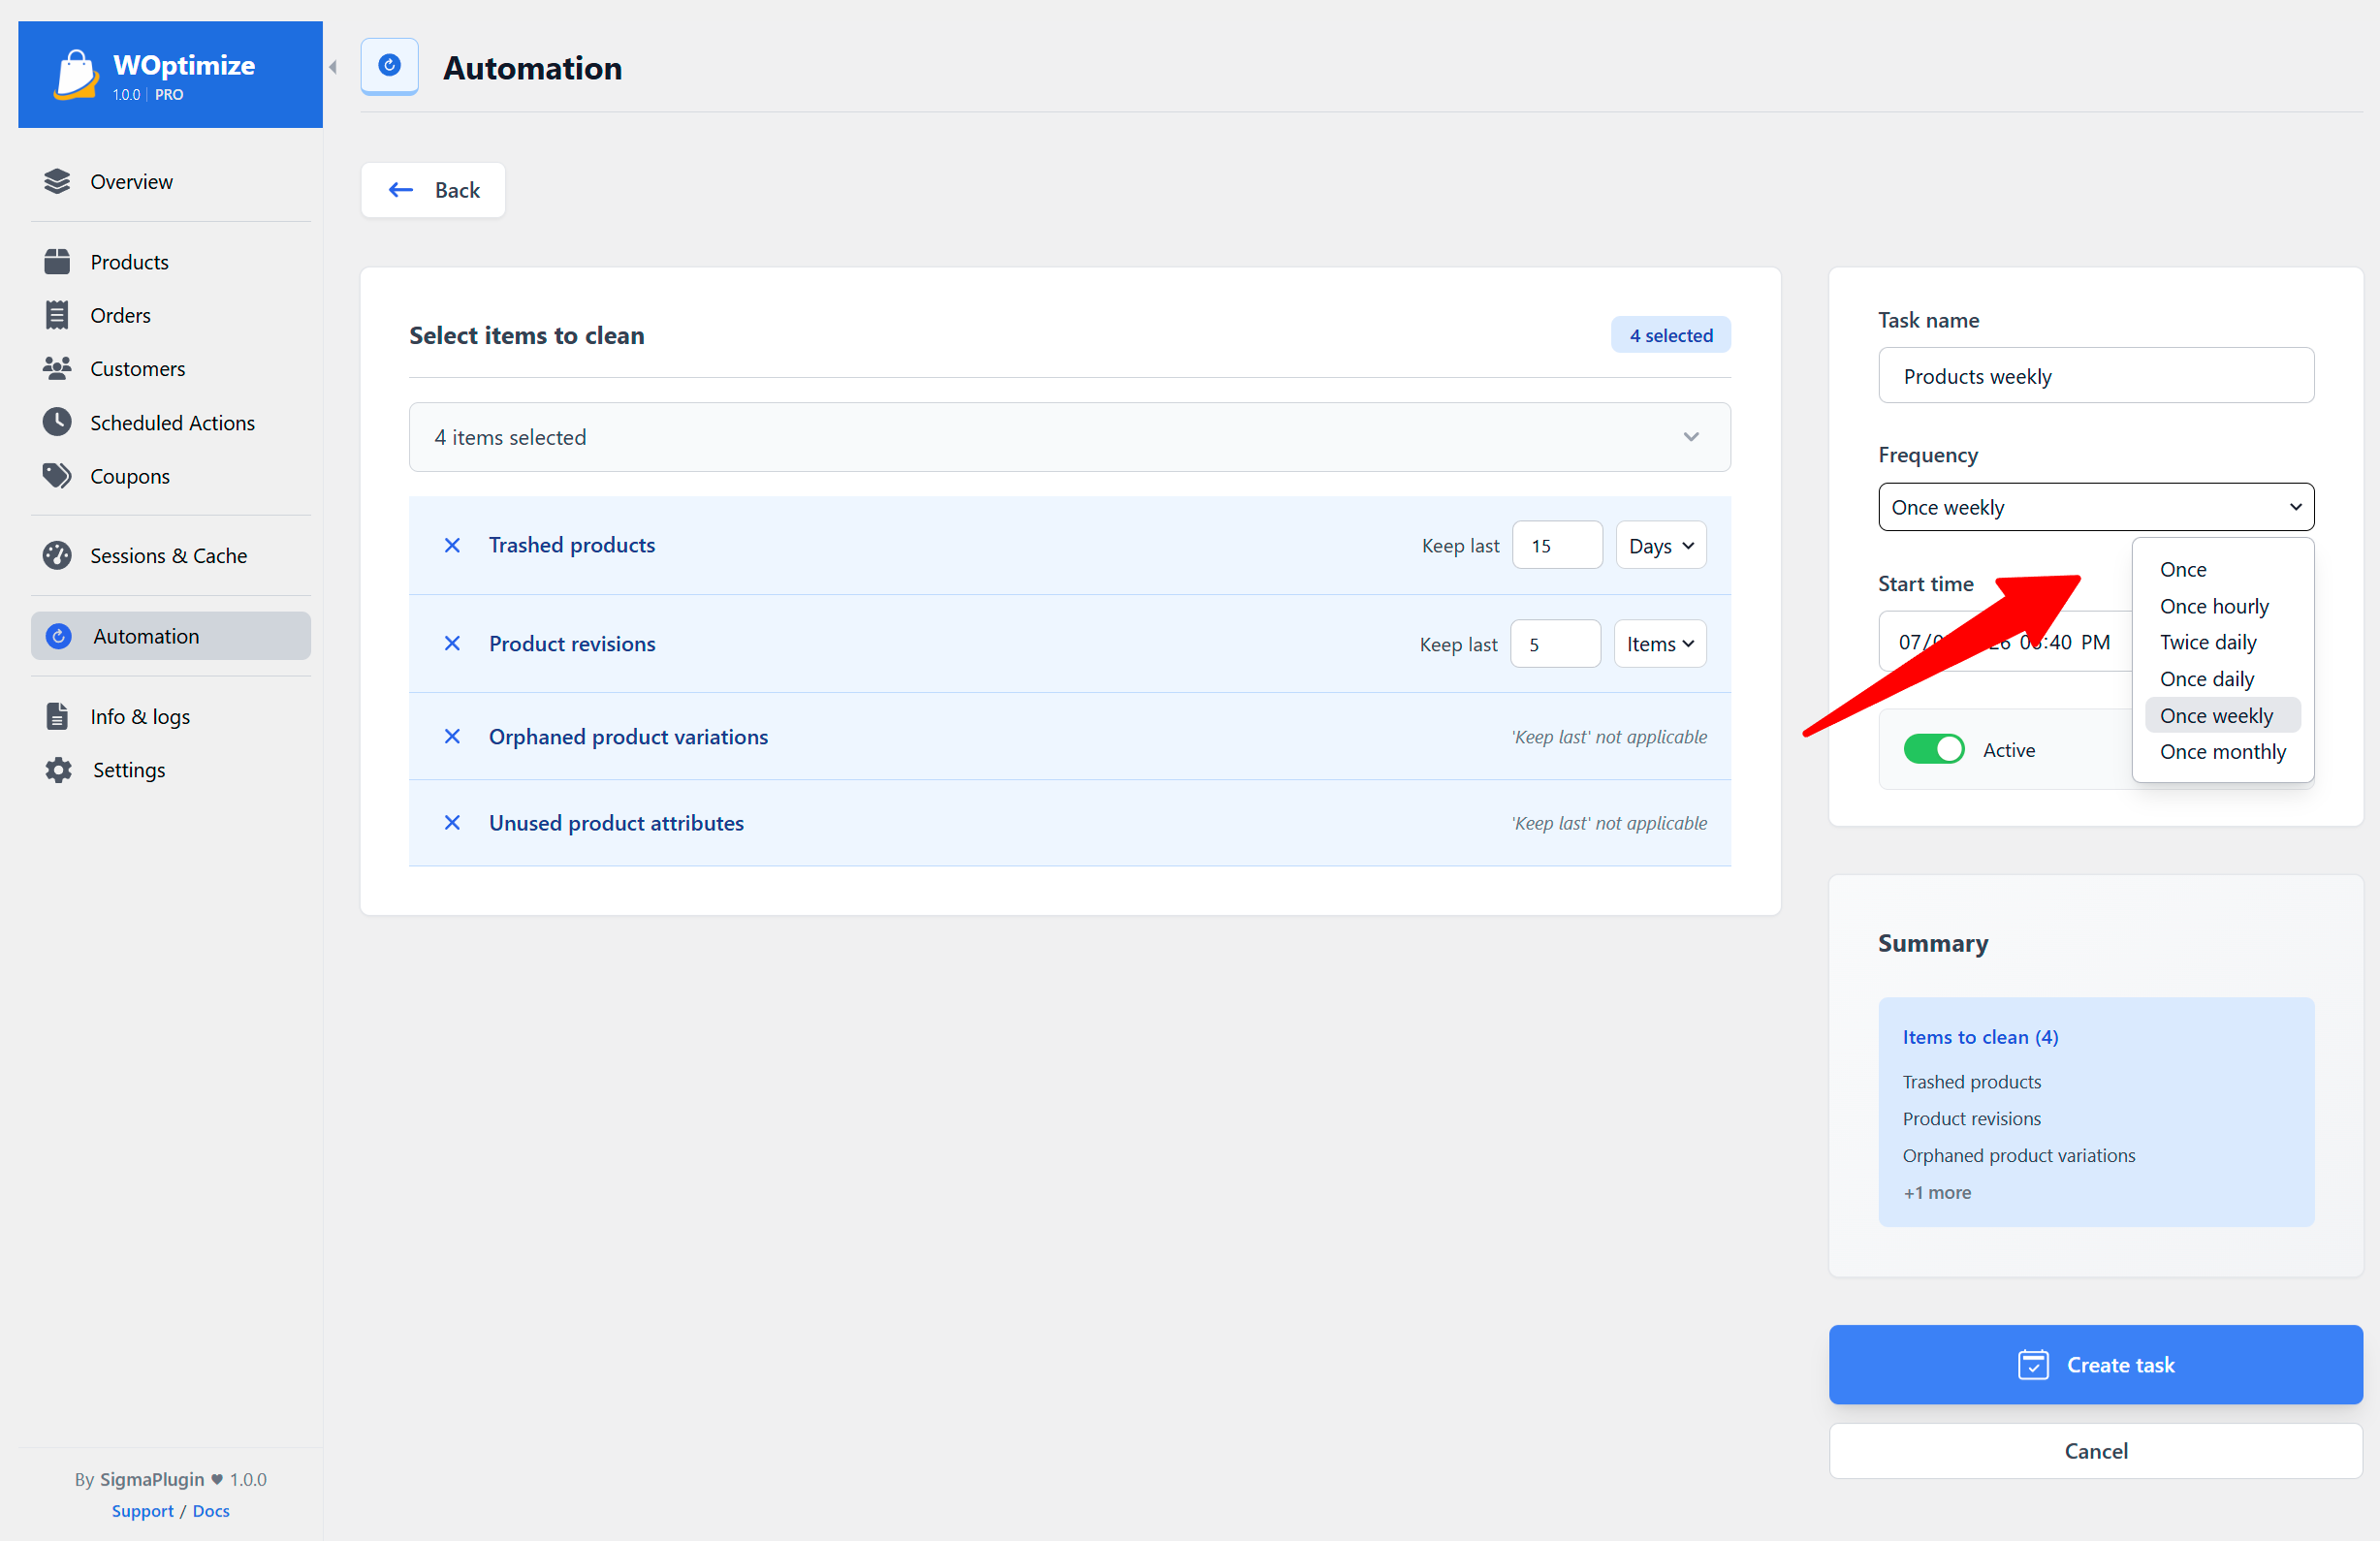
-
Set the schedule
Choose the starting date and time, and define how frequently the task should run.
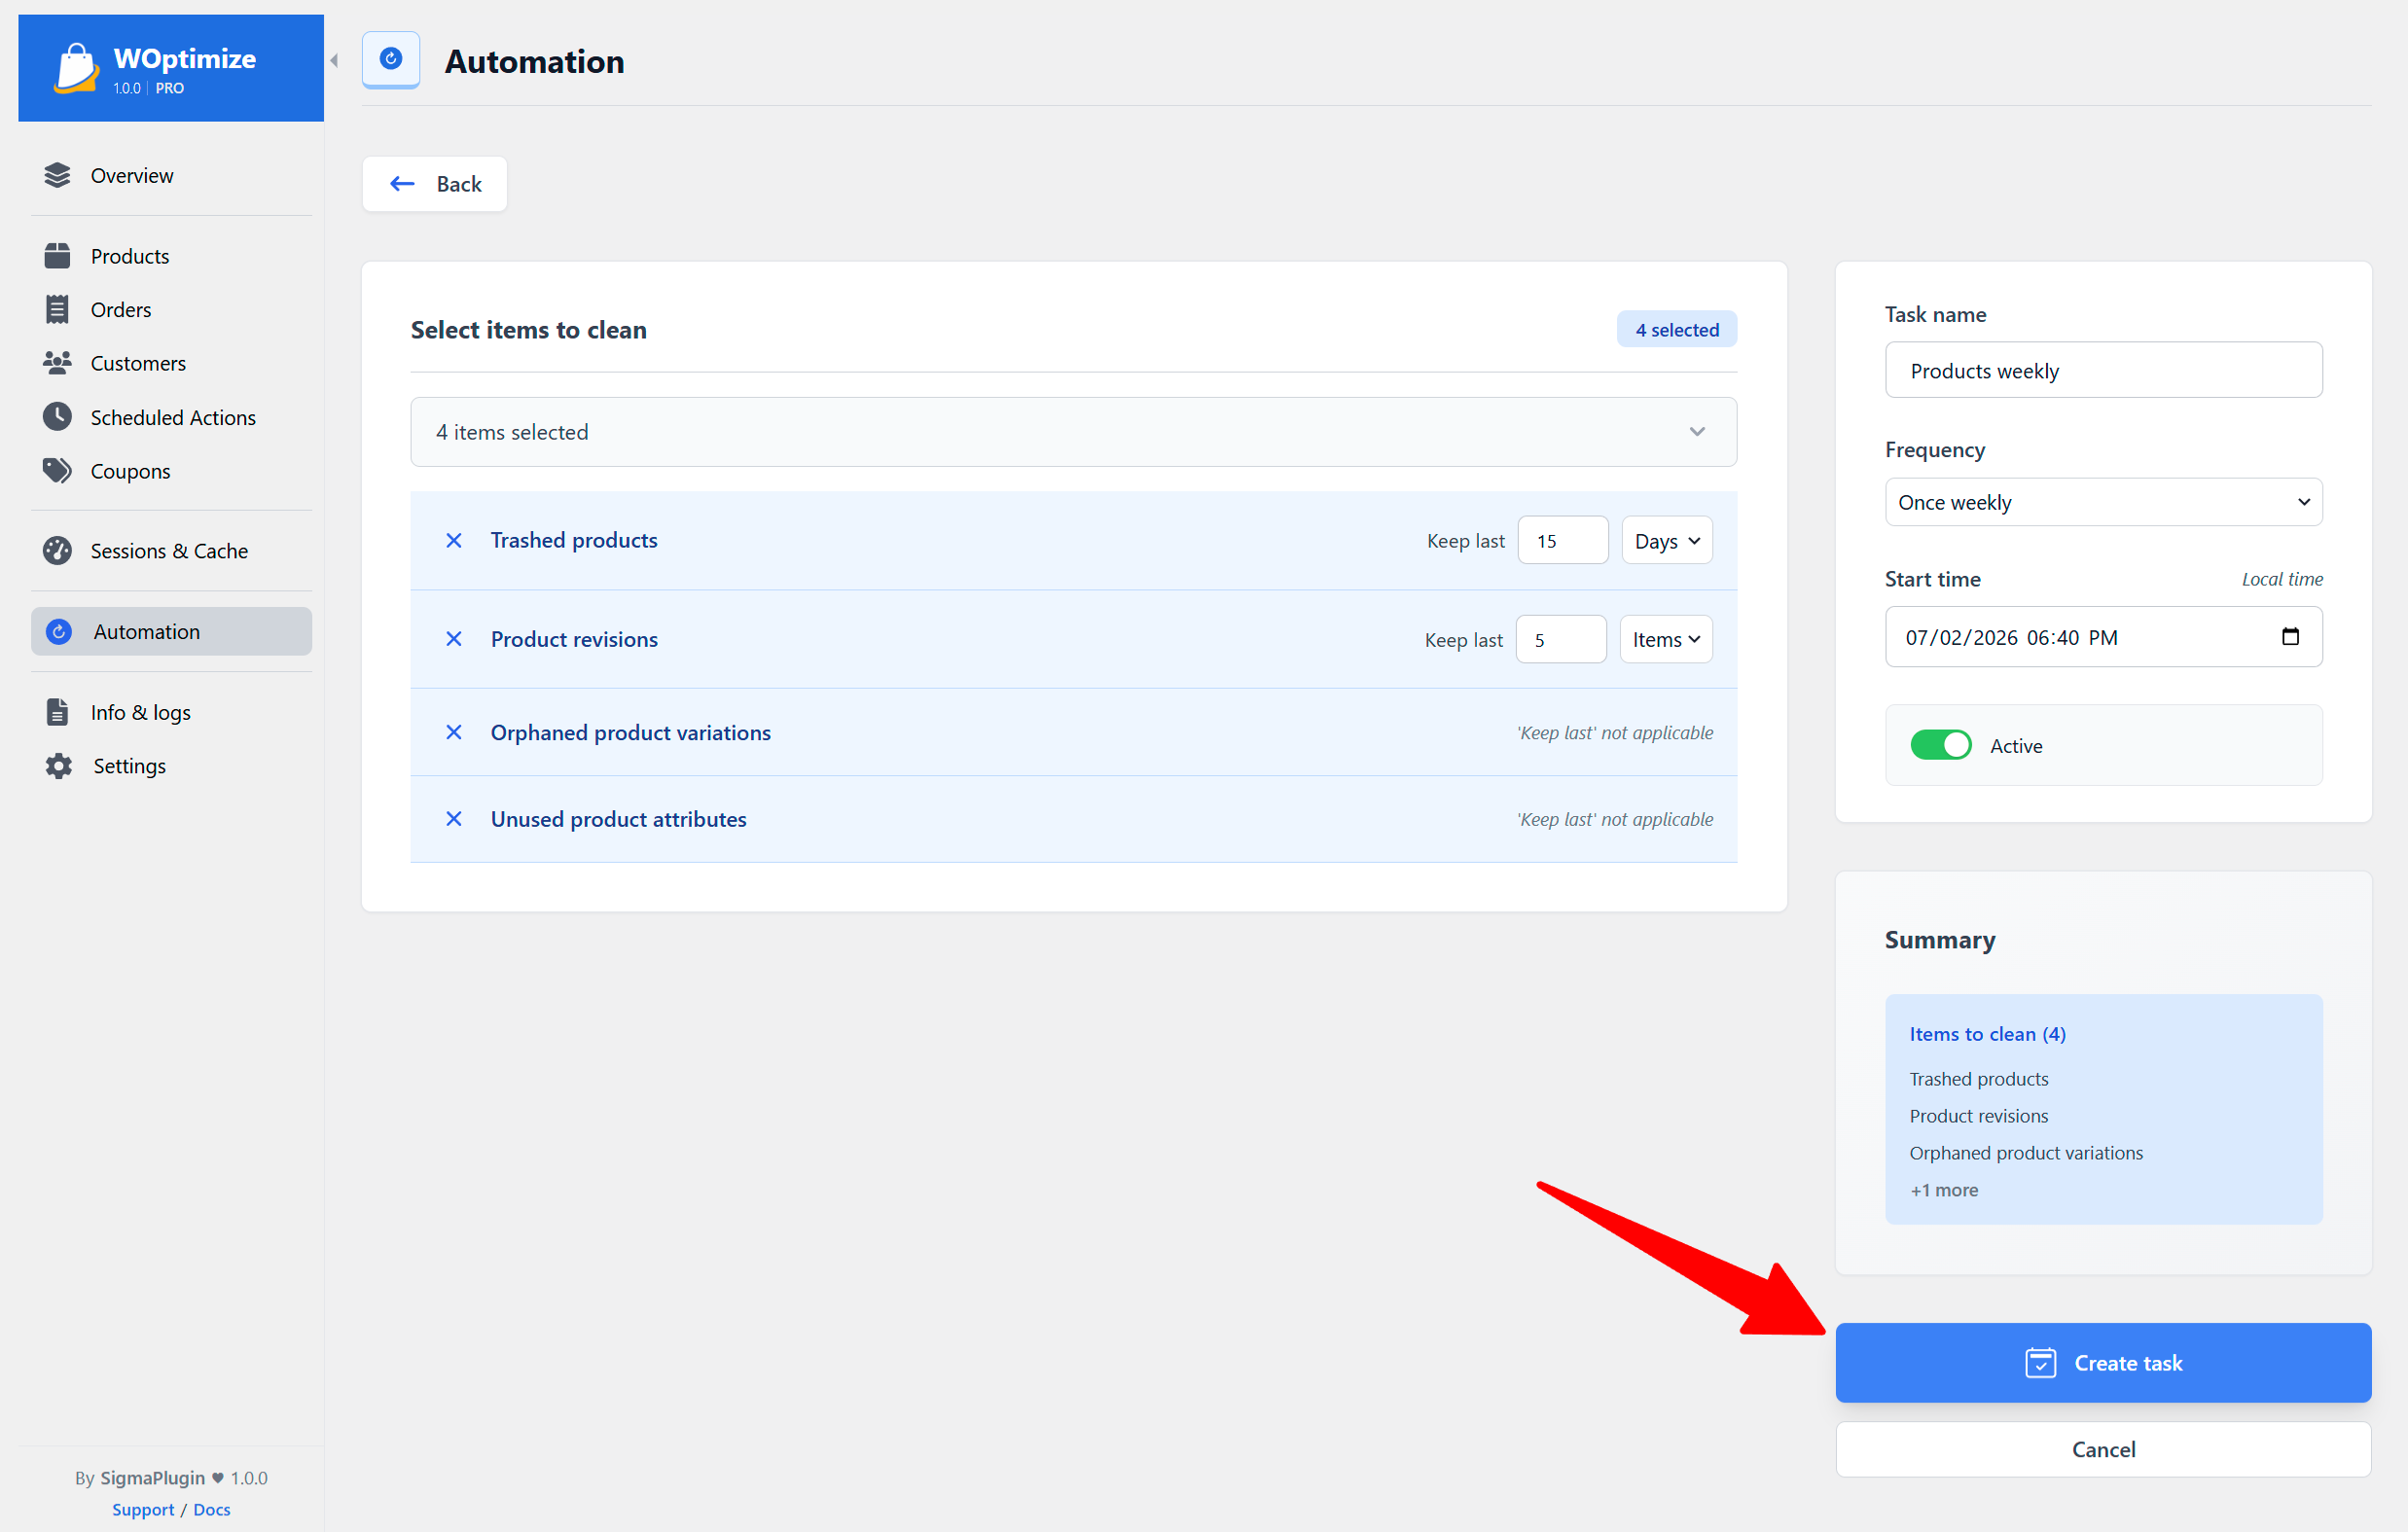
-
Review and create the task
Review the configuration, choose whether the task should start active or paused, and create it.


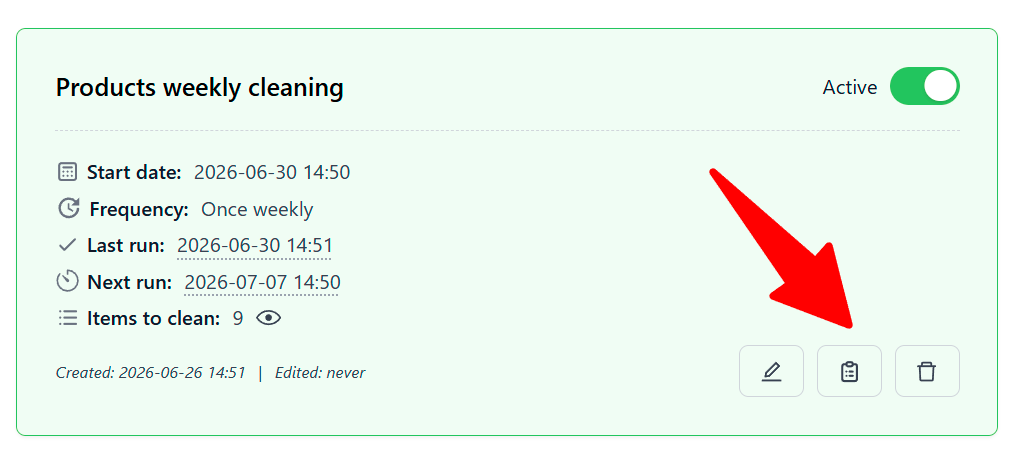
Managing Existing Automations
From the Automation page, you can:
- Activate or pause a task
- Edit its cleanup items, retention rules, or schedule
- Delete a task that is no longer needed
- View its selected cleanup items
- Open its events log
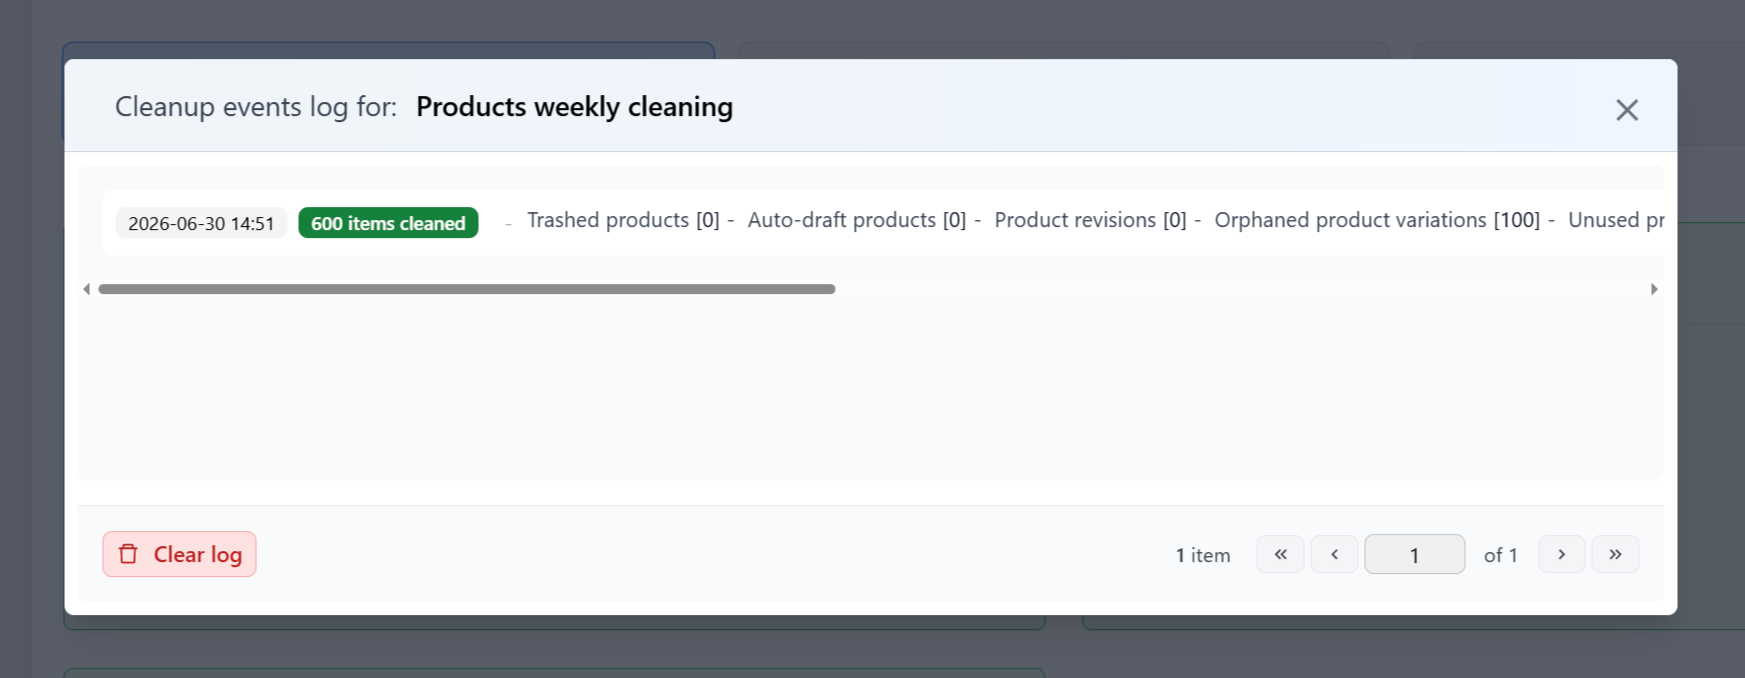
Automation Logs
Each automation has an events log where you can review its execution history. This helps you confirm when the task ran and inspect the recorded details for each execution.
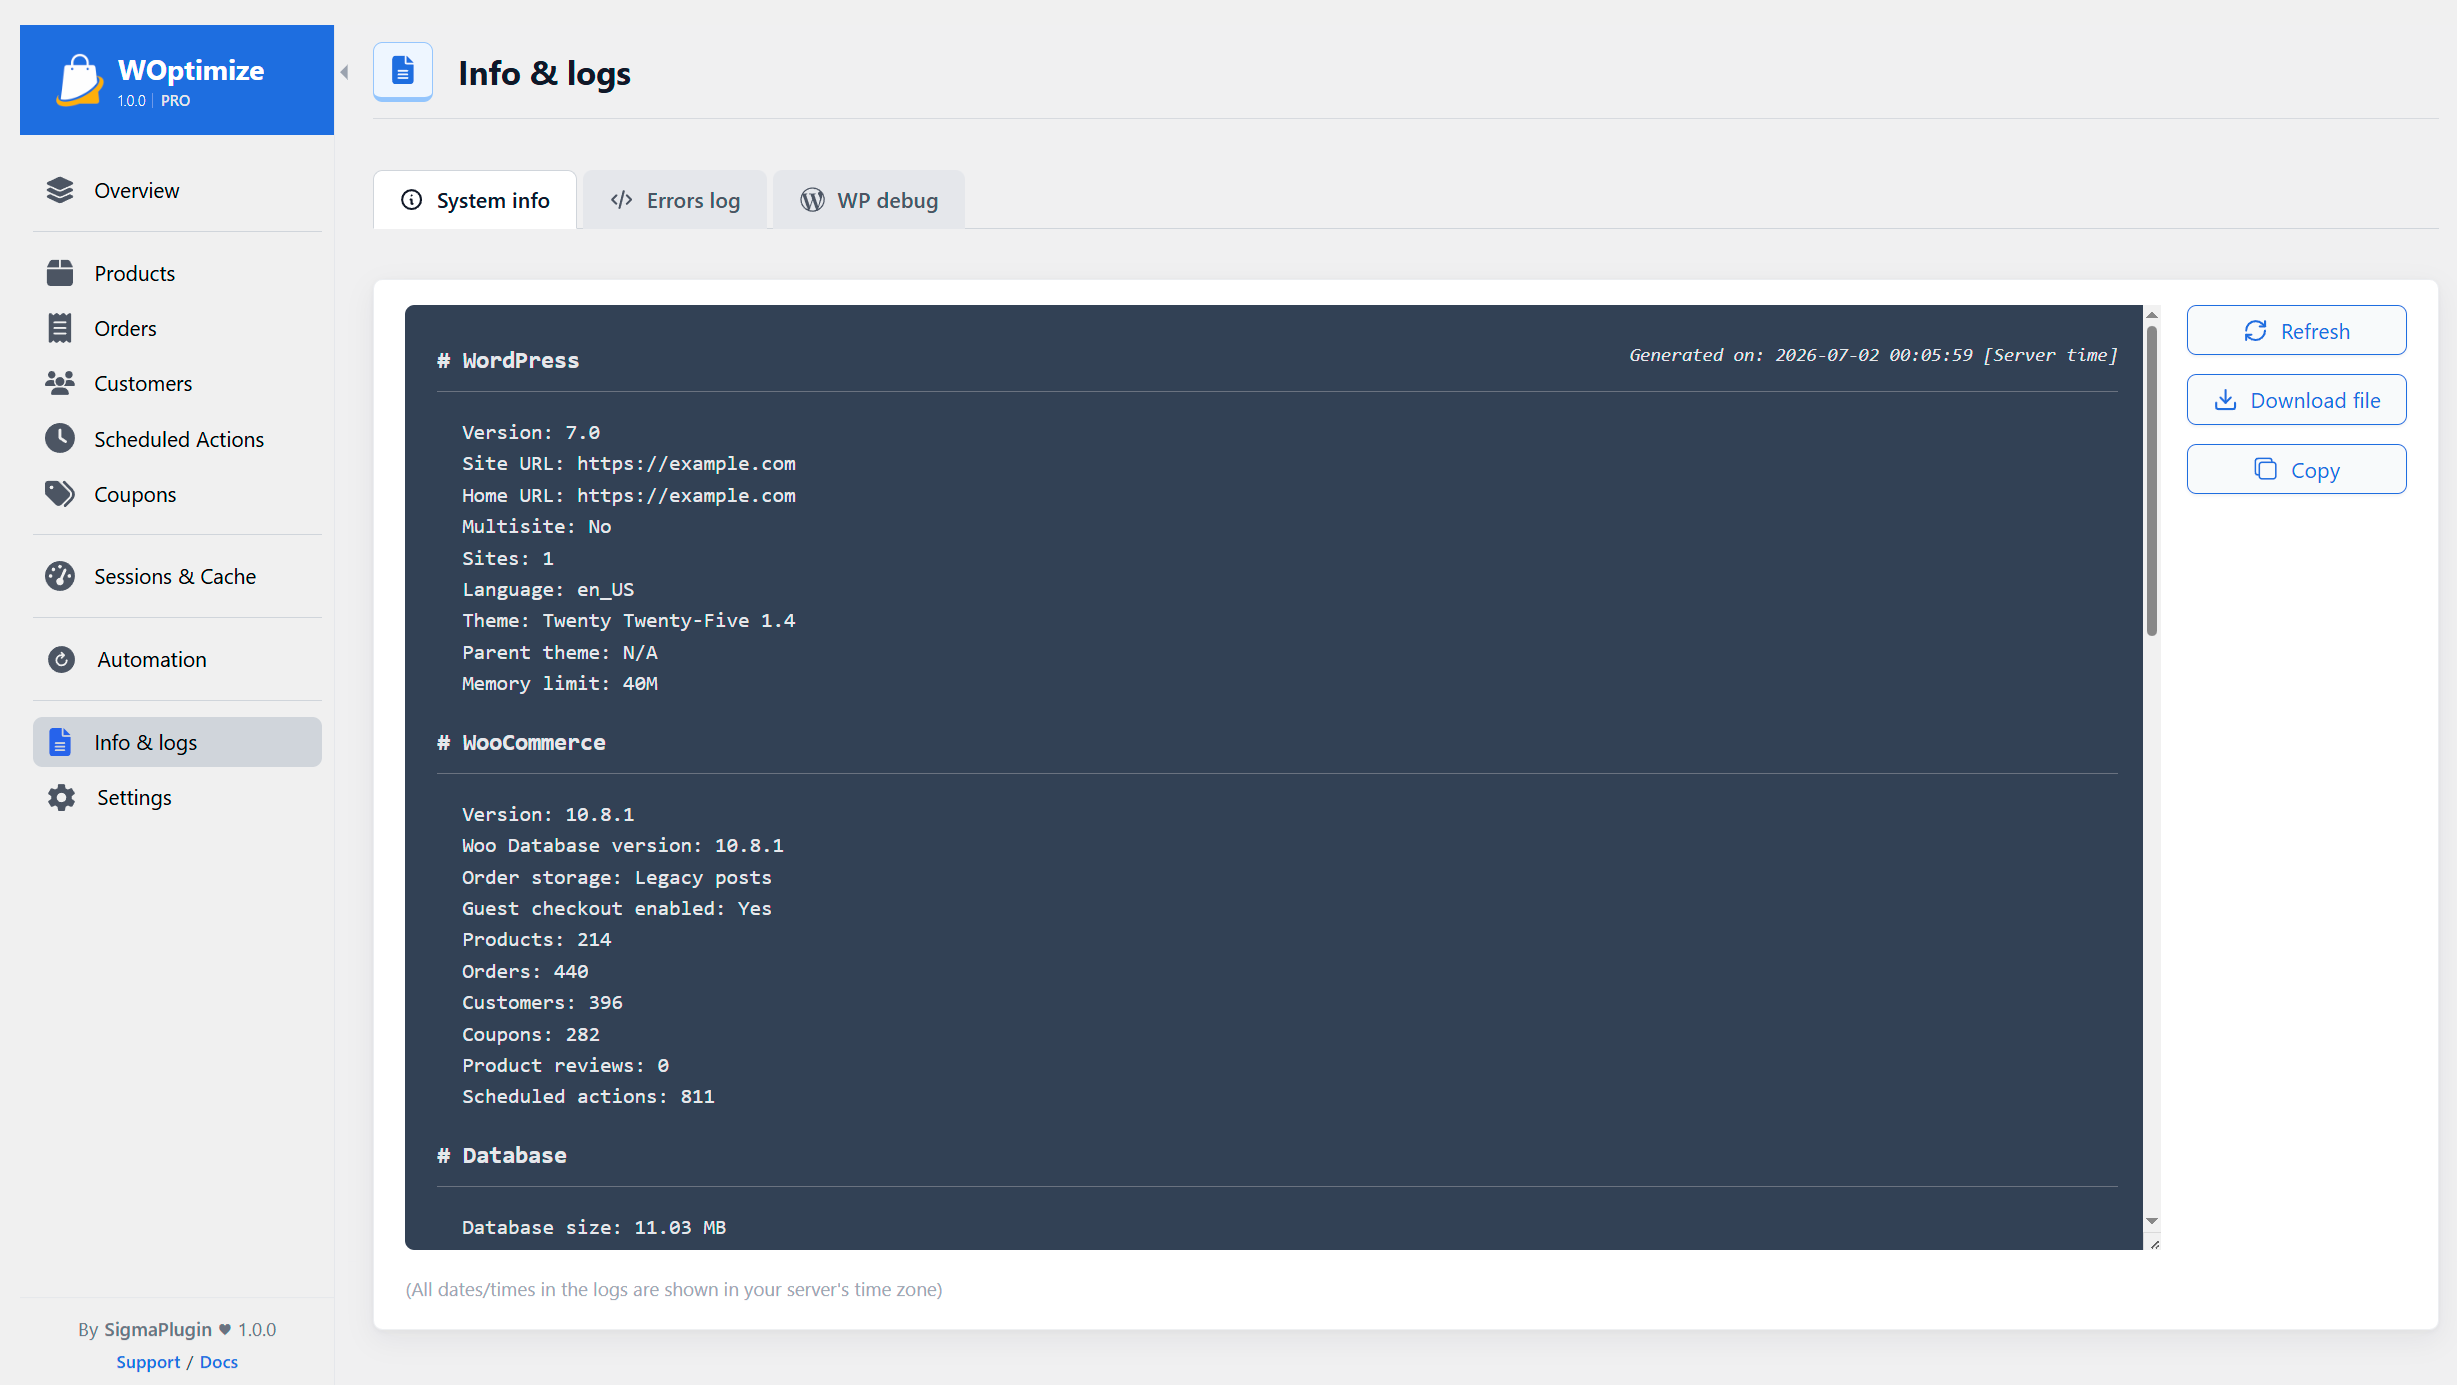
Info & Logs
The Info & Logs section provides system information for troubleshooting. You can refresh, copy, or download it, and view the woptimize errors log and WordPress debug log.
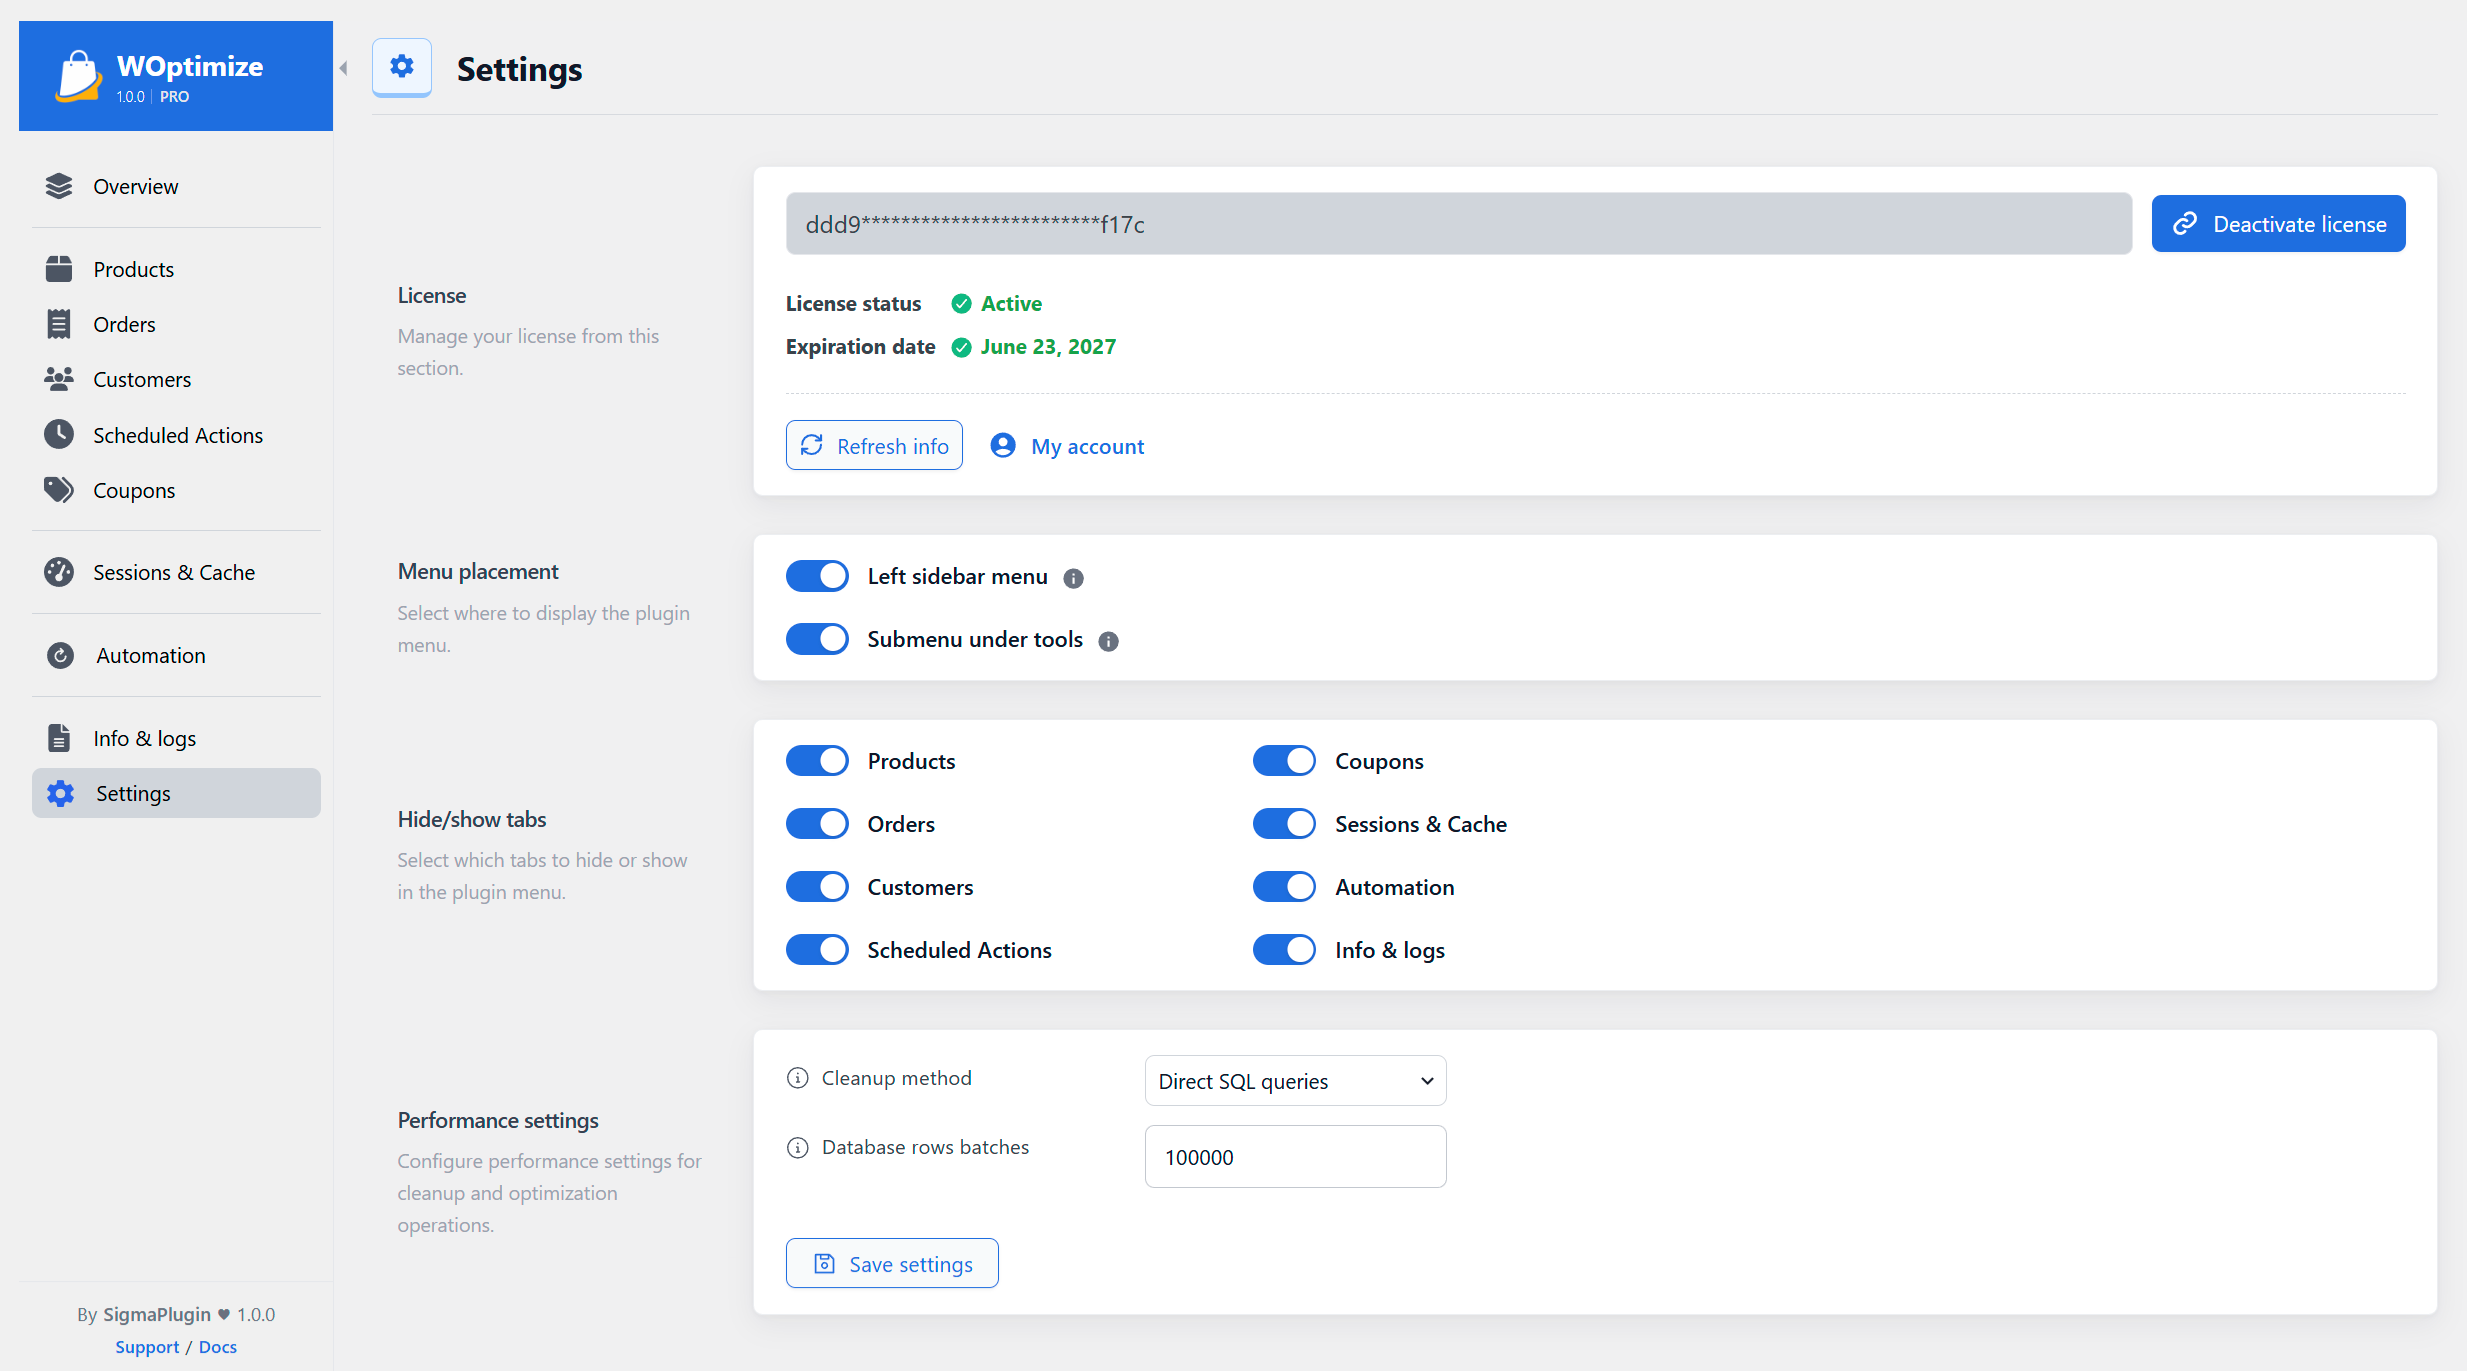
Settings
The Settings page lets you:
- Manage your license
- Choose where the plugin menu appears
- Show or hide plugin sections
- Configure the cleanup method and database batch size